How to Blur in Canva: Photos, Texts, and Backgrounds
Welcome to Part 2 of this mini Canva tutorial series! Today, we’re going to talk about blurs! In this article, you’ll learn how to blur images, parts of images, words, and entire backgrounds!
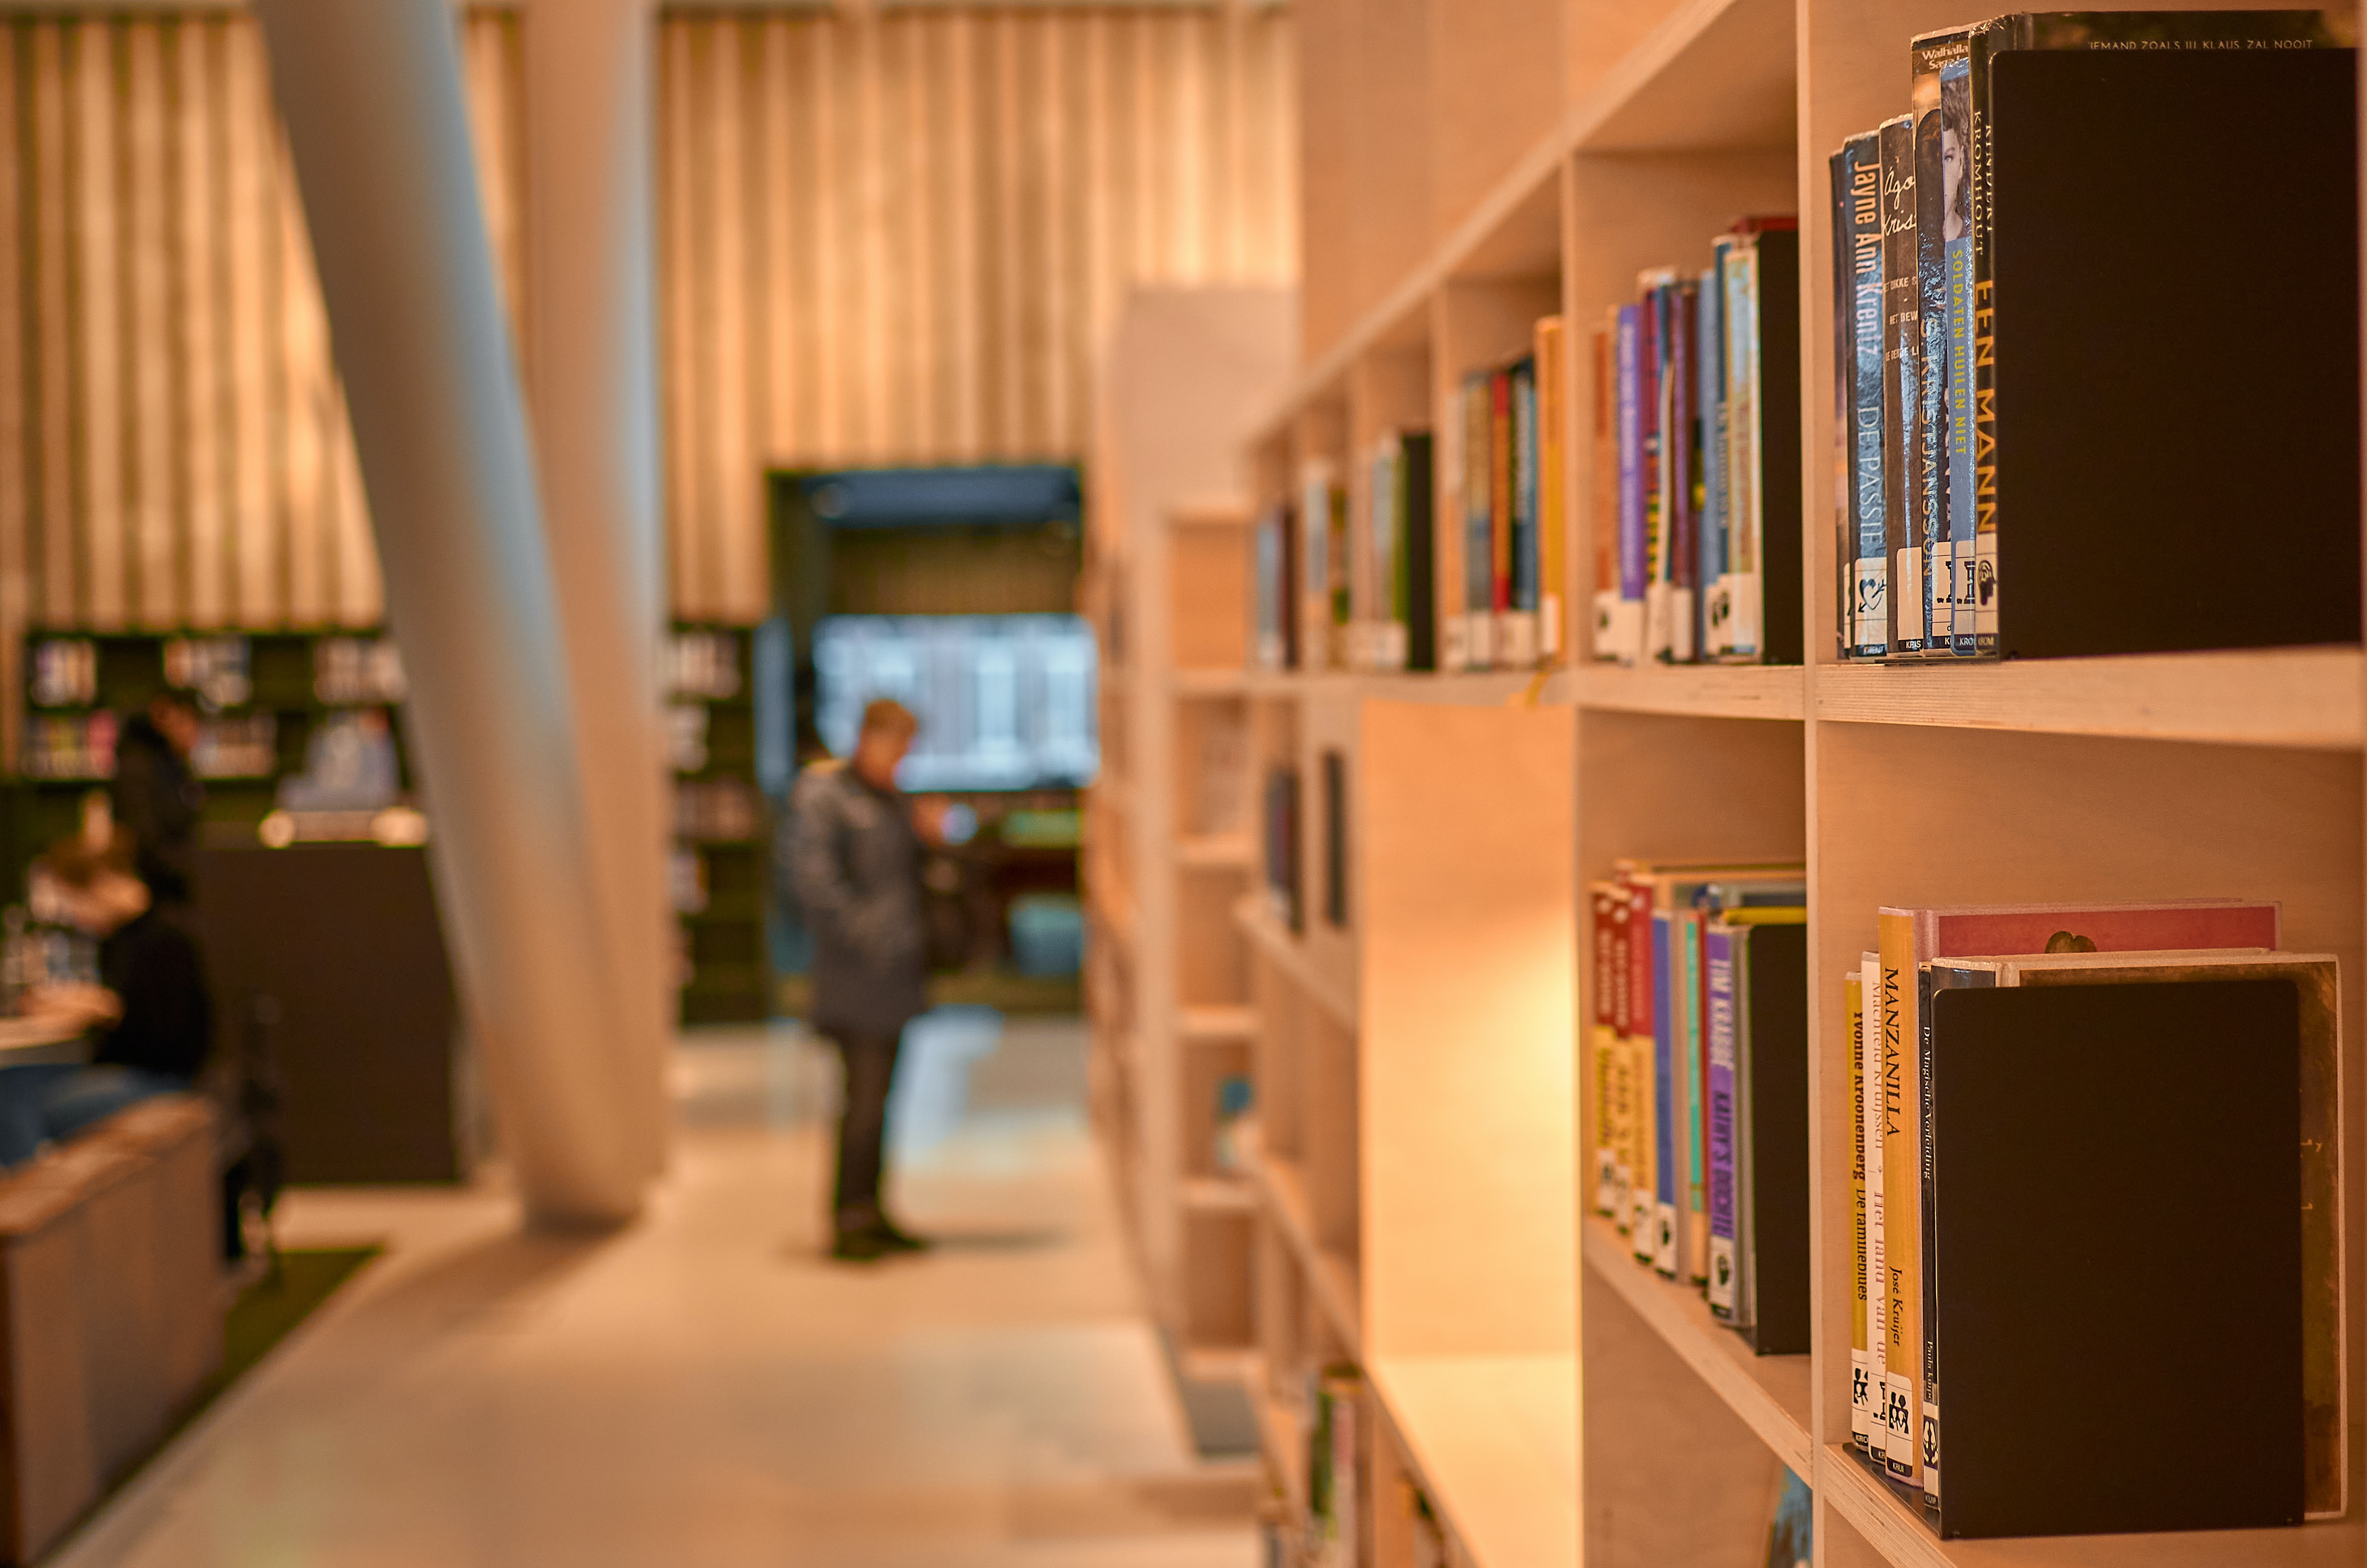
Canva is an intuitive, drag & drop styled graphic software with tons of useful mini tools, and luckily, blurring is one of them! To make things even better, Canva has multiple ways of blurring things, whether they’re images or texts. It even has a feature that mimics Portrait Mode in many smartphone cameras nowadays.
To help un-blur your understanding of how blurring works in Canva, I’ve decided to list them all here:
- Automatic Blurring
- Manual, Brush-styled Blurring
- Portrait Mode Blurring to Bring Subjects Front & Center
Quick tip #1: The first two steps of all these methods are the same, which is to select the photo and click on “Effects”.
How to blur photos in Canva
Blurring an entire image can be done by selecting the photo > clicking “Effects” > choosing the blur tool > picking auto > adjusting intensity > apply changes. For more detailed instructions, follow the steps below.
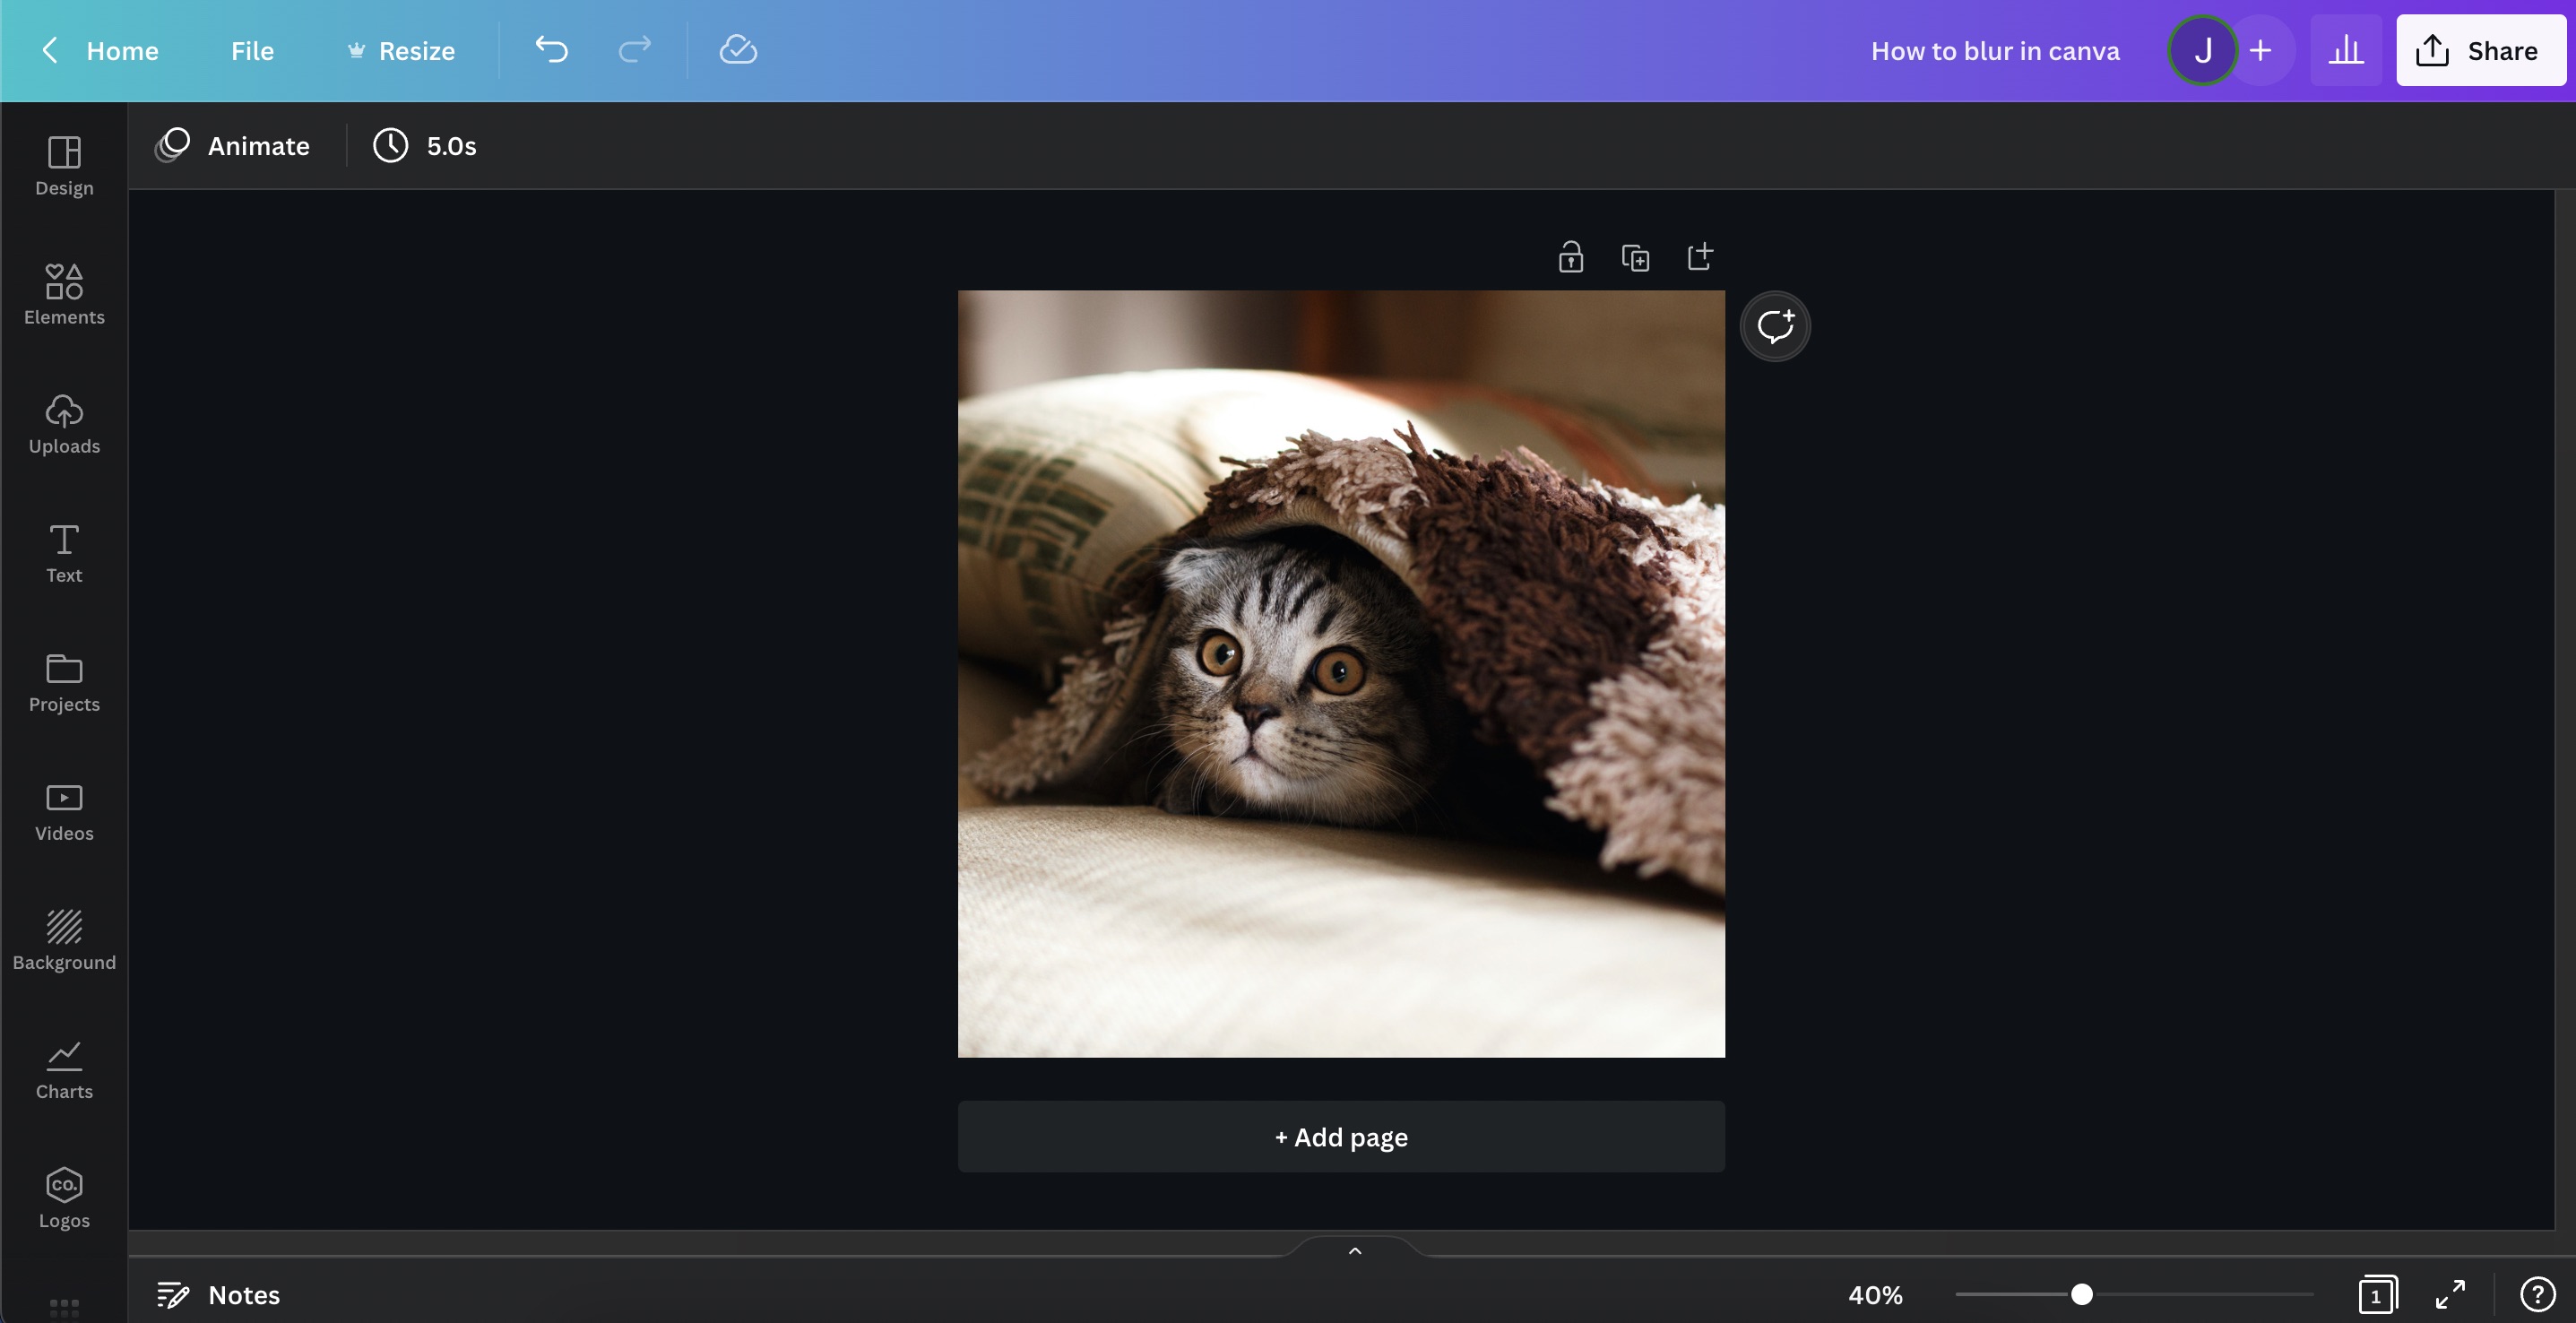
Step 1: Select Your Photo
First thing’s first, select your photo. This way, Canva knows which thing you want to edit. Although a bit disappointing, you cannot select multiple photos and blur them all at once. In order to blur multiple photos, you would have to repeat the process for all of them.
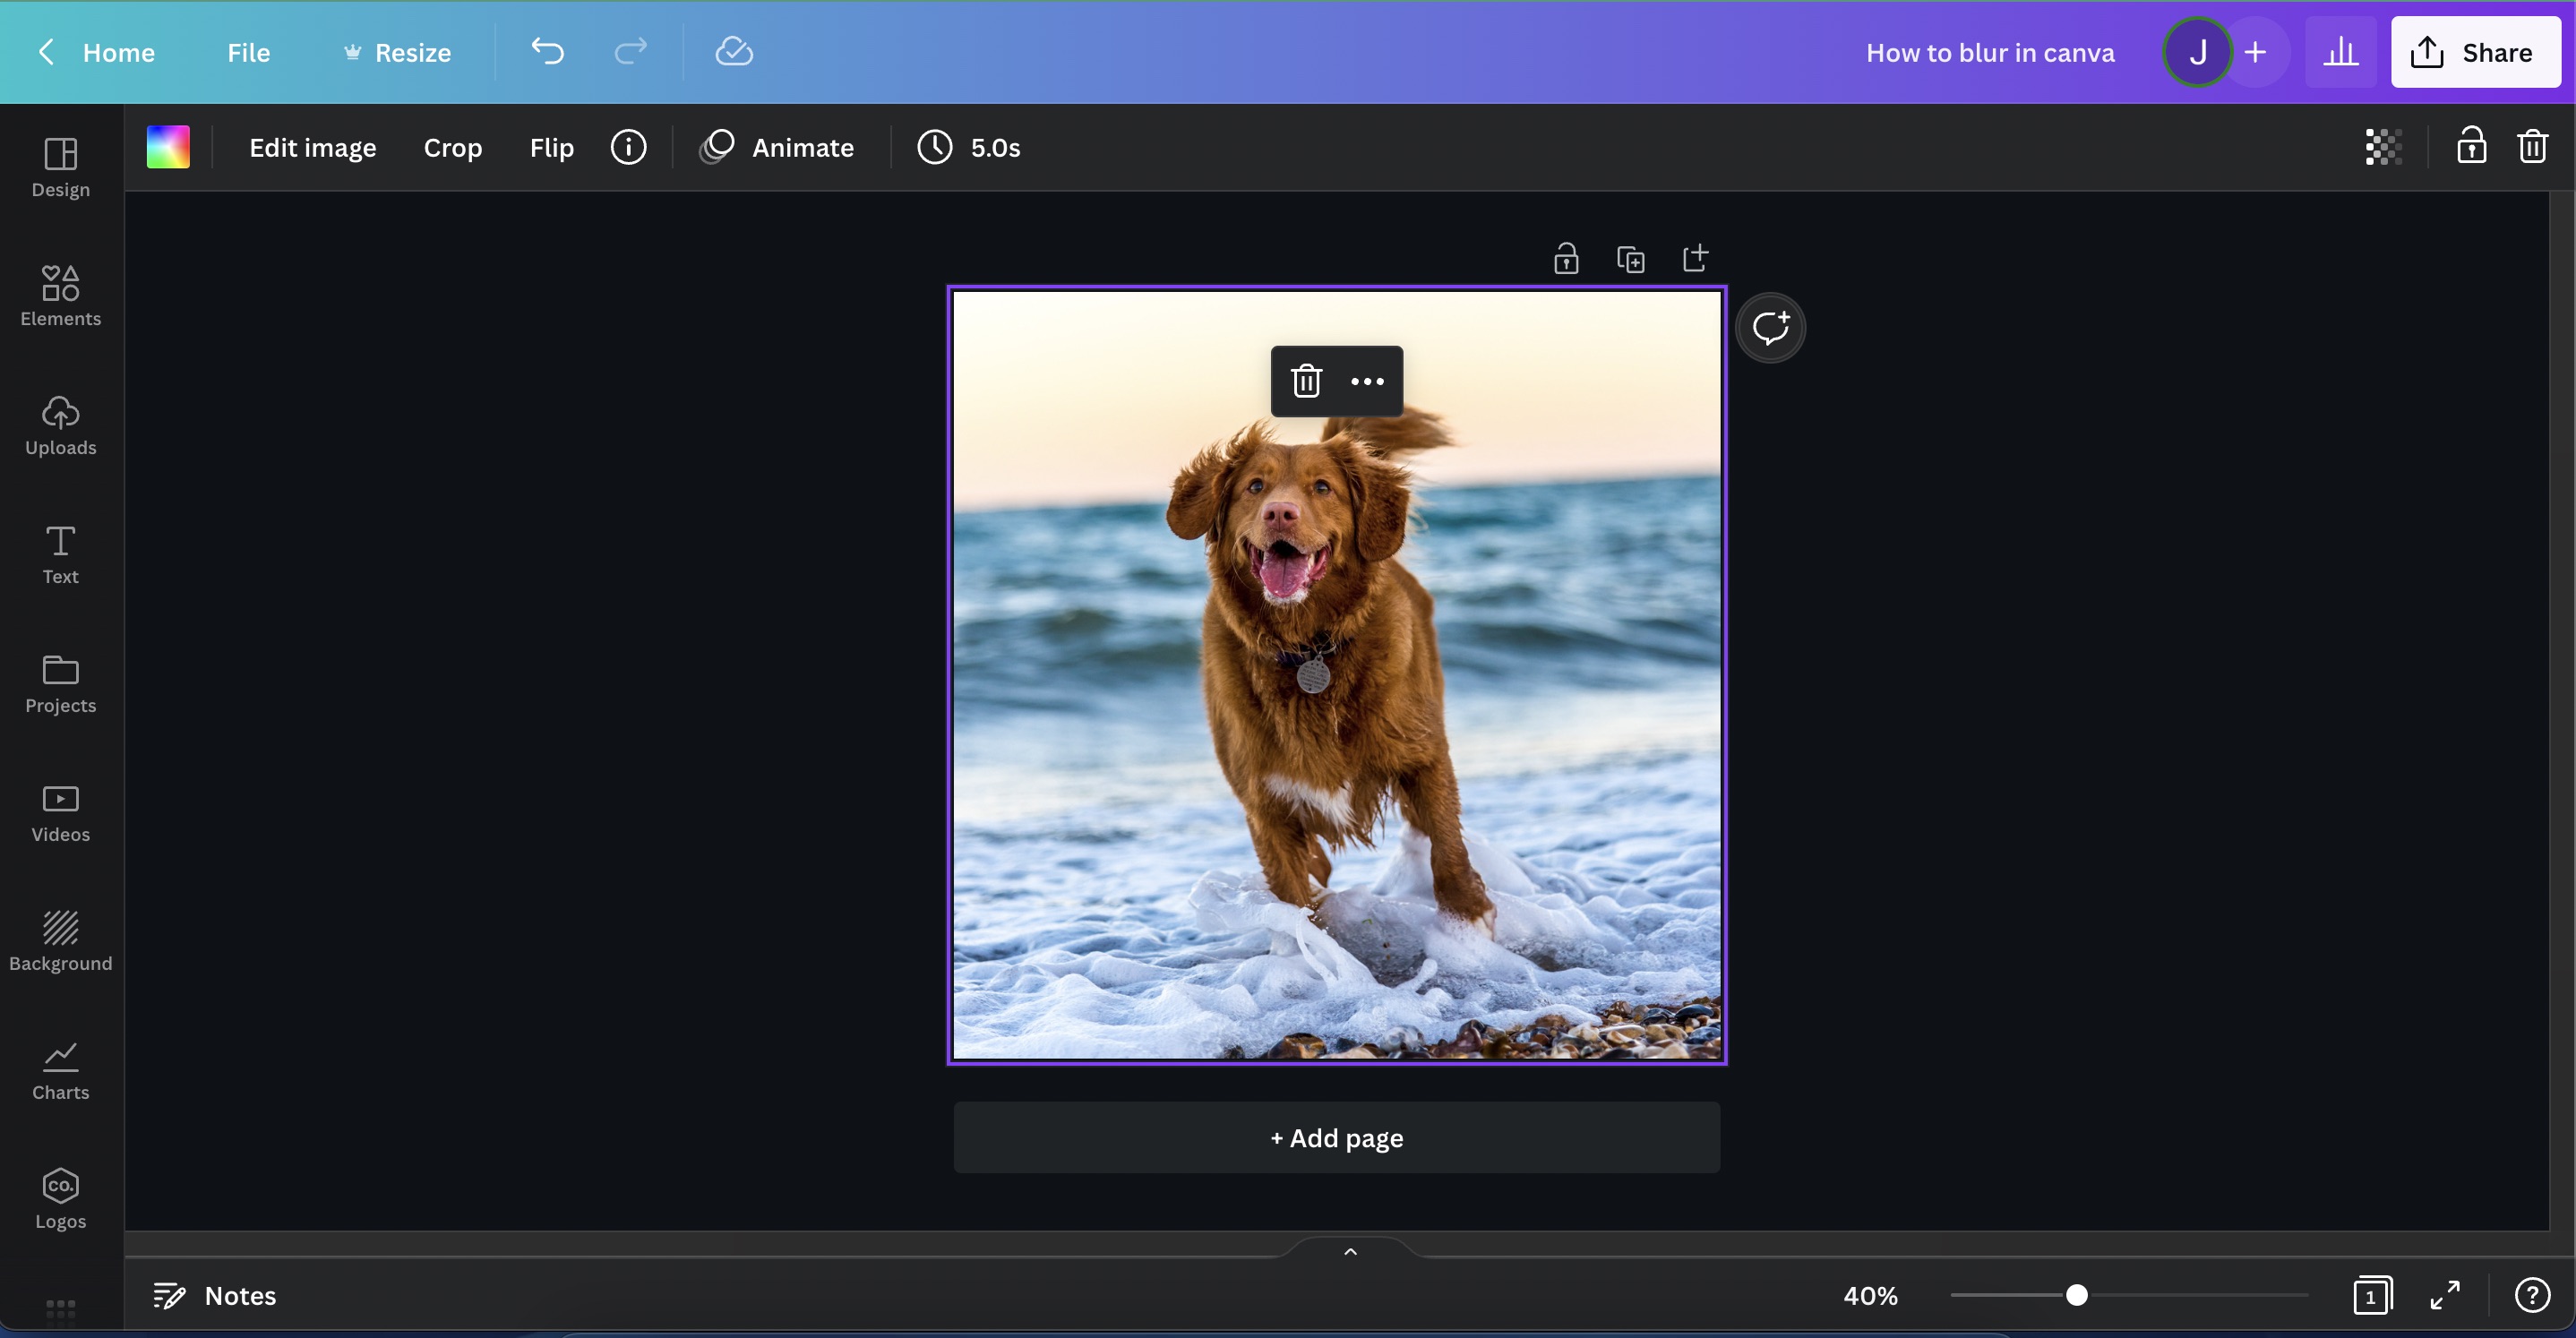
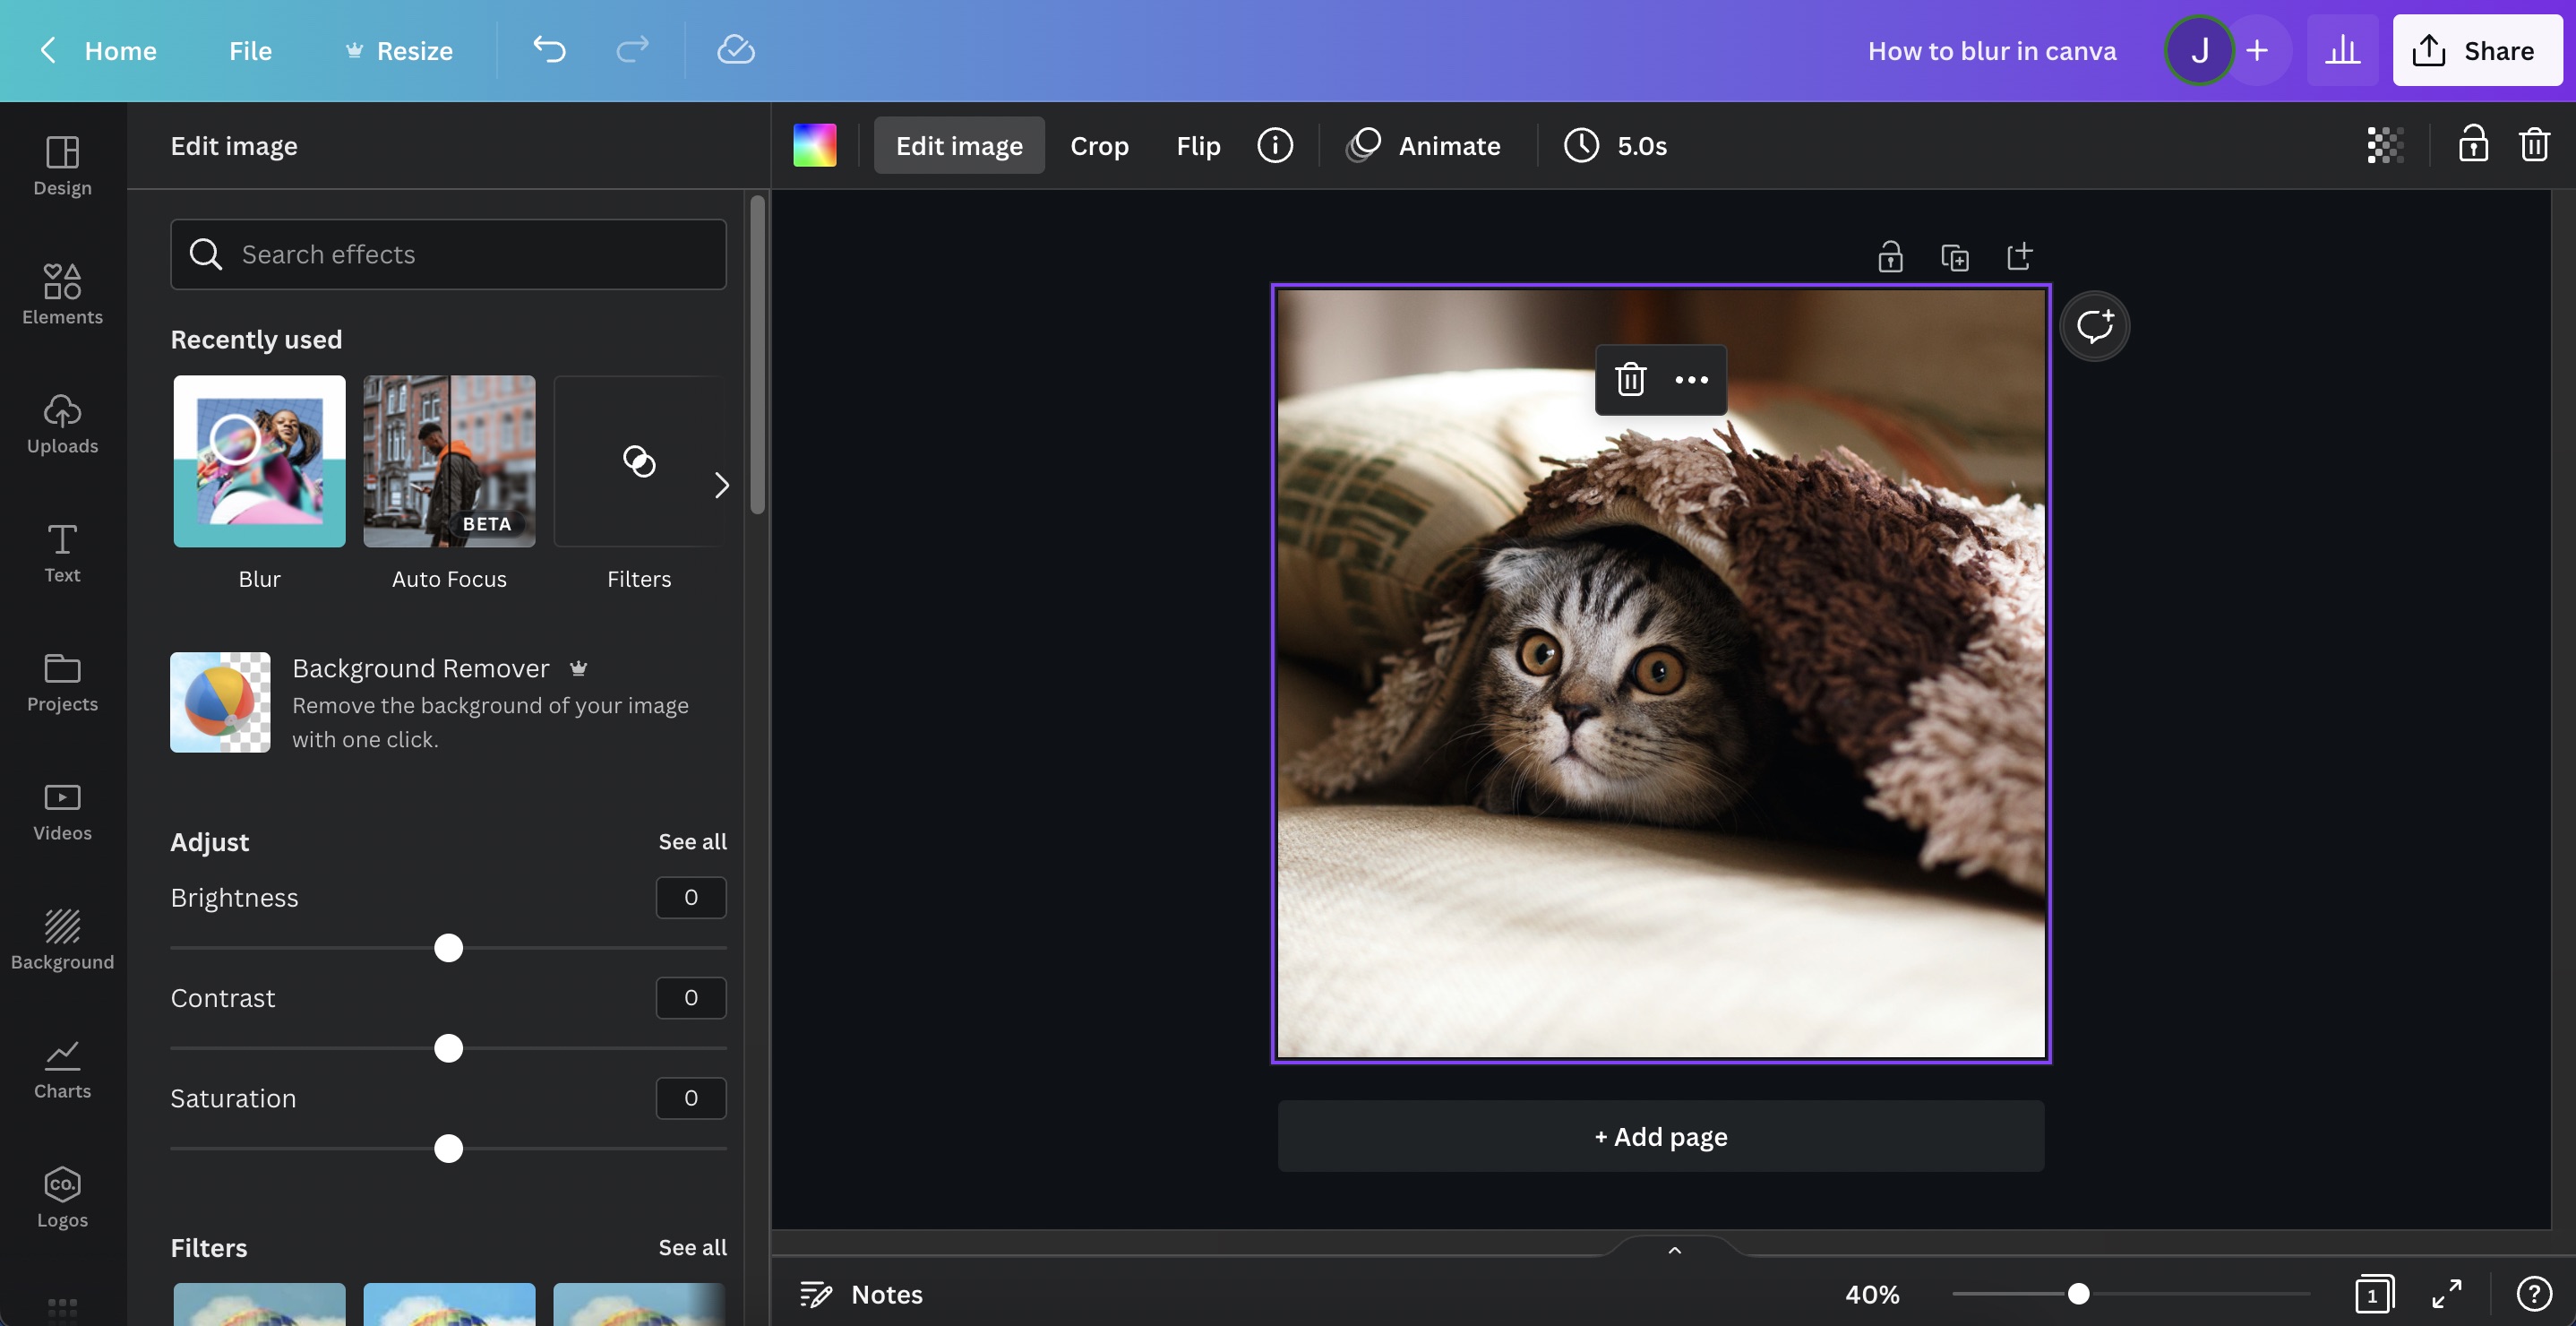
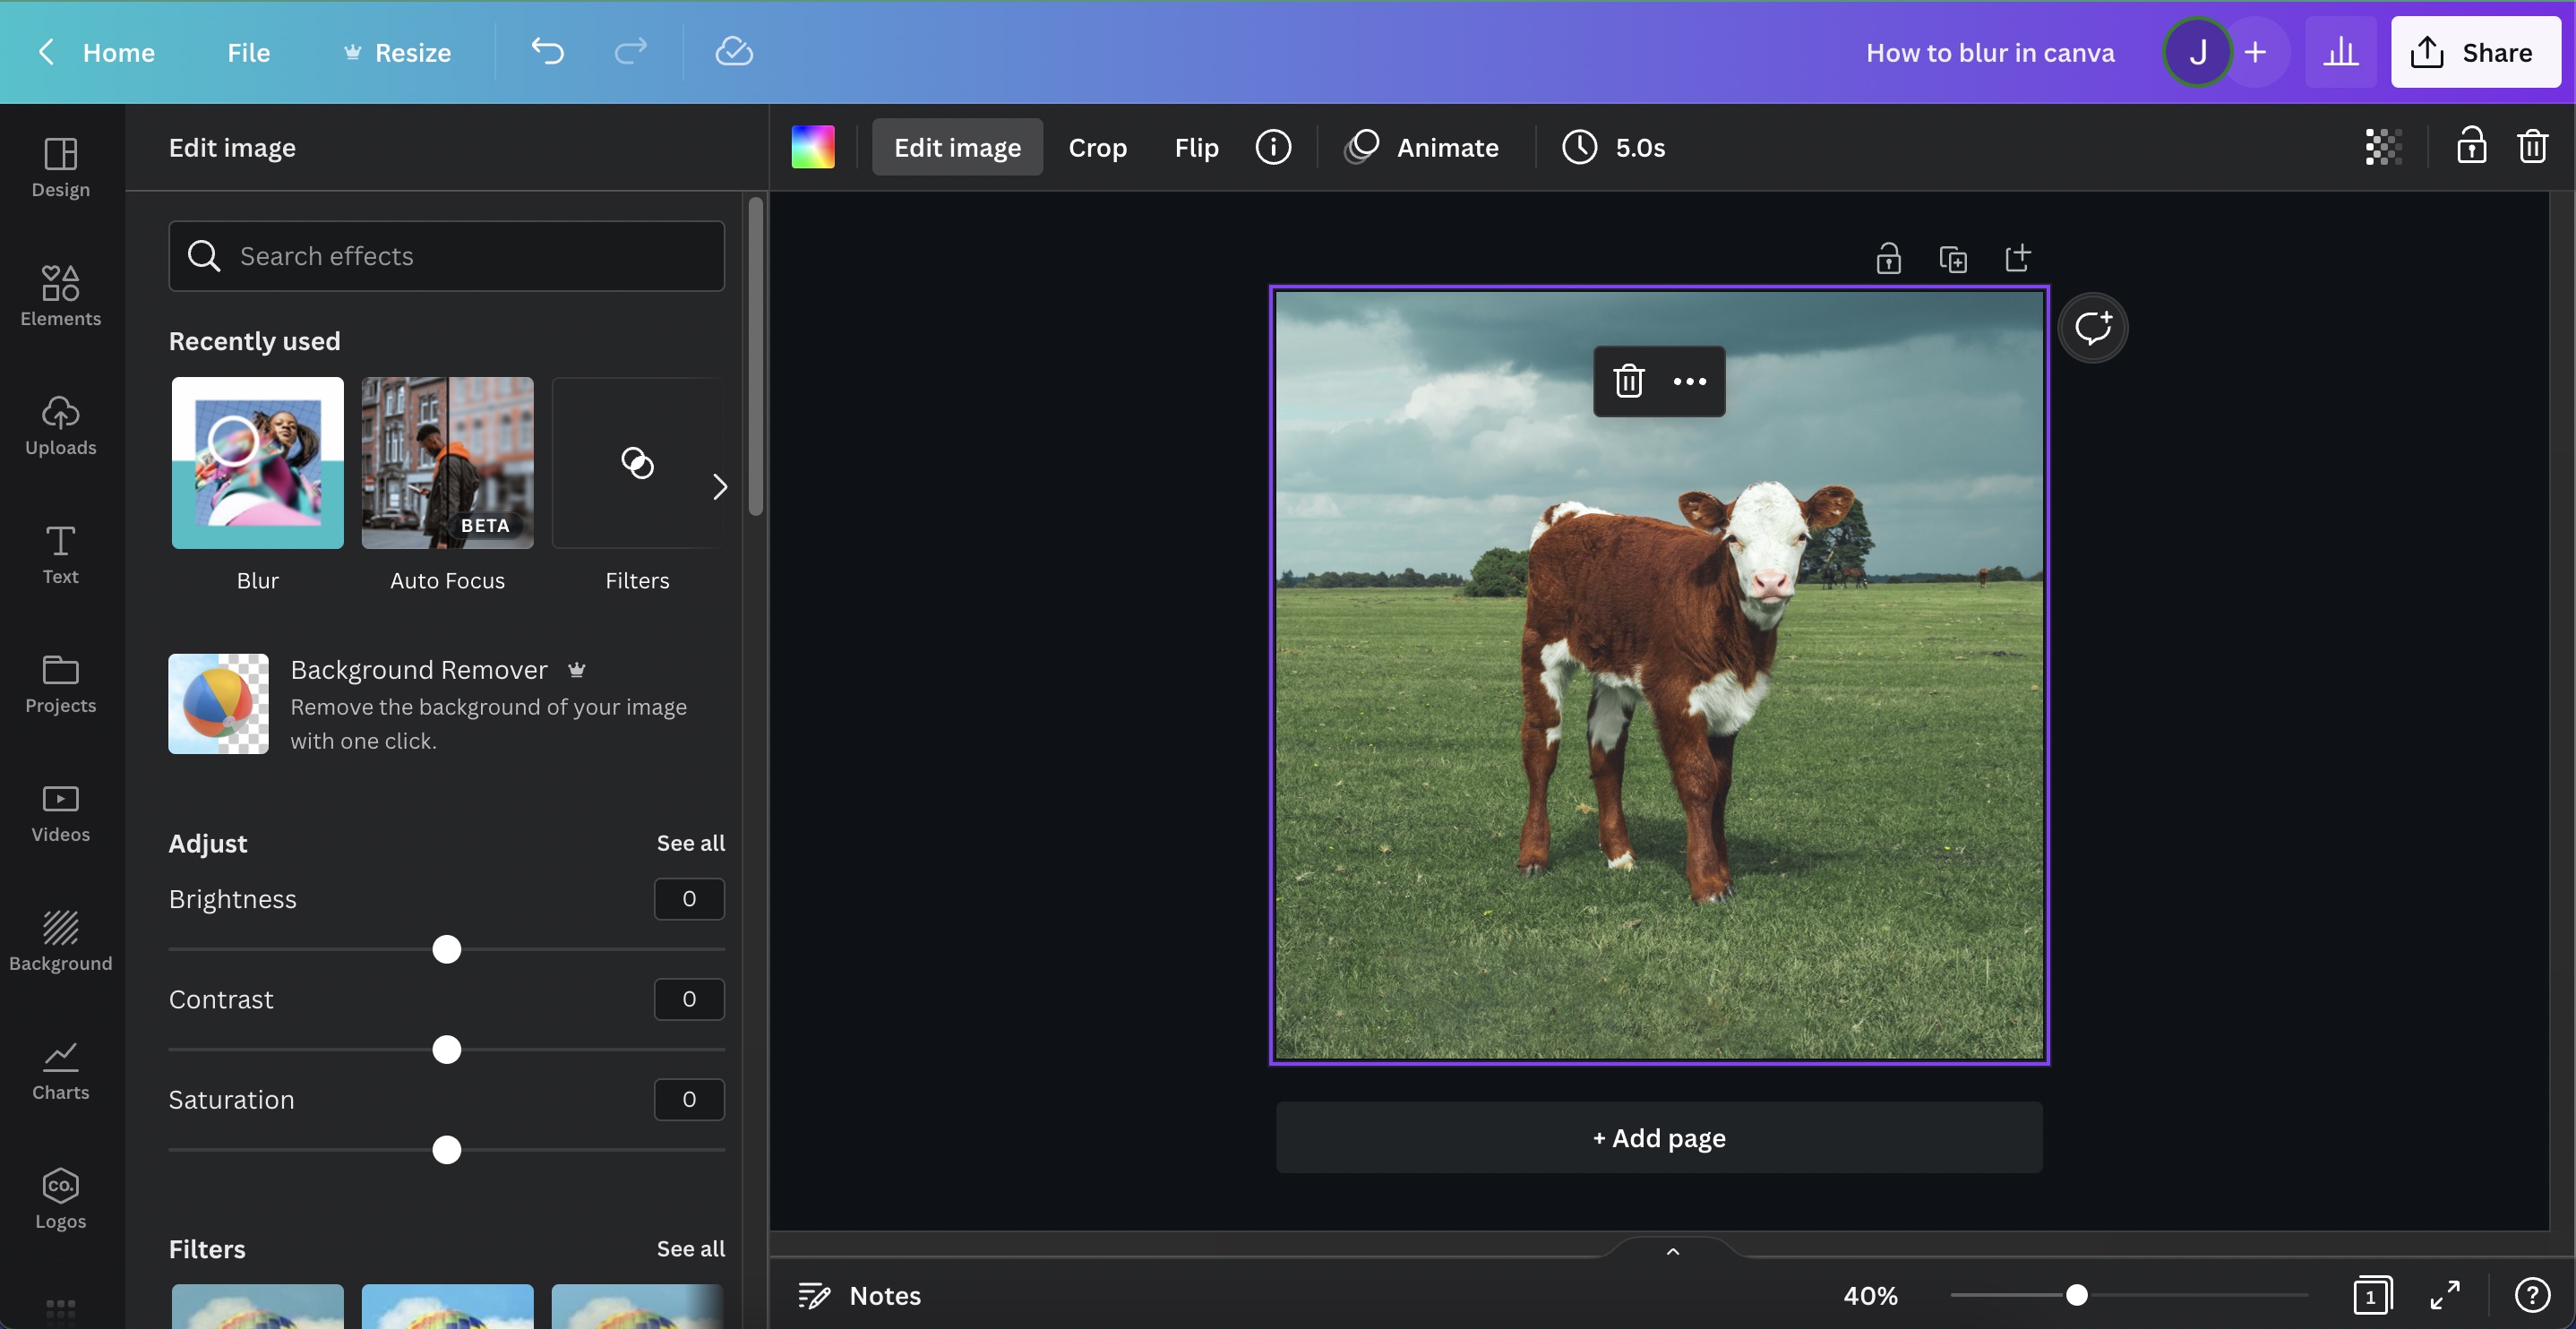
Step 2: Click “Edit Image”
Clicking the photo opens up a new toolbar on top. Find and click on “Edit Image”.
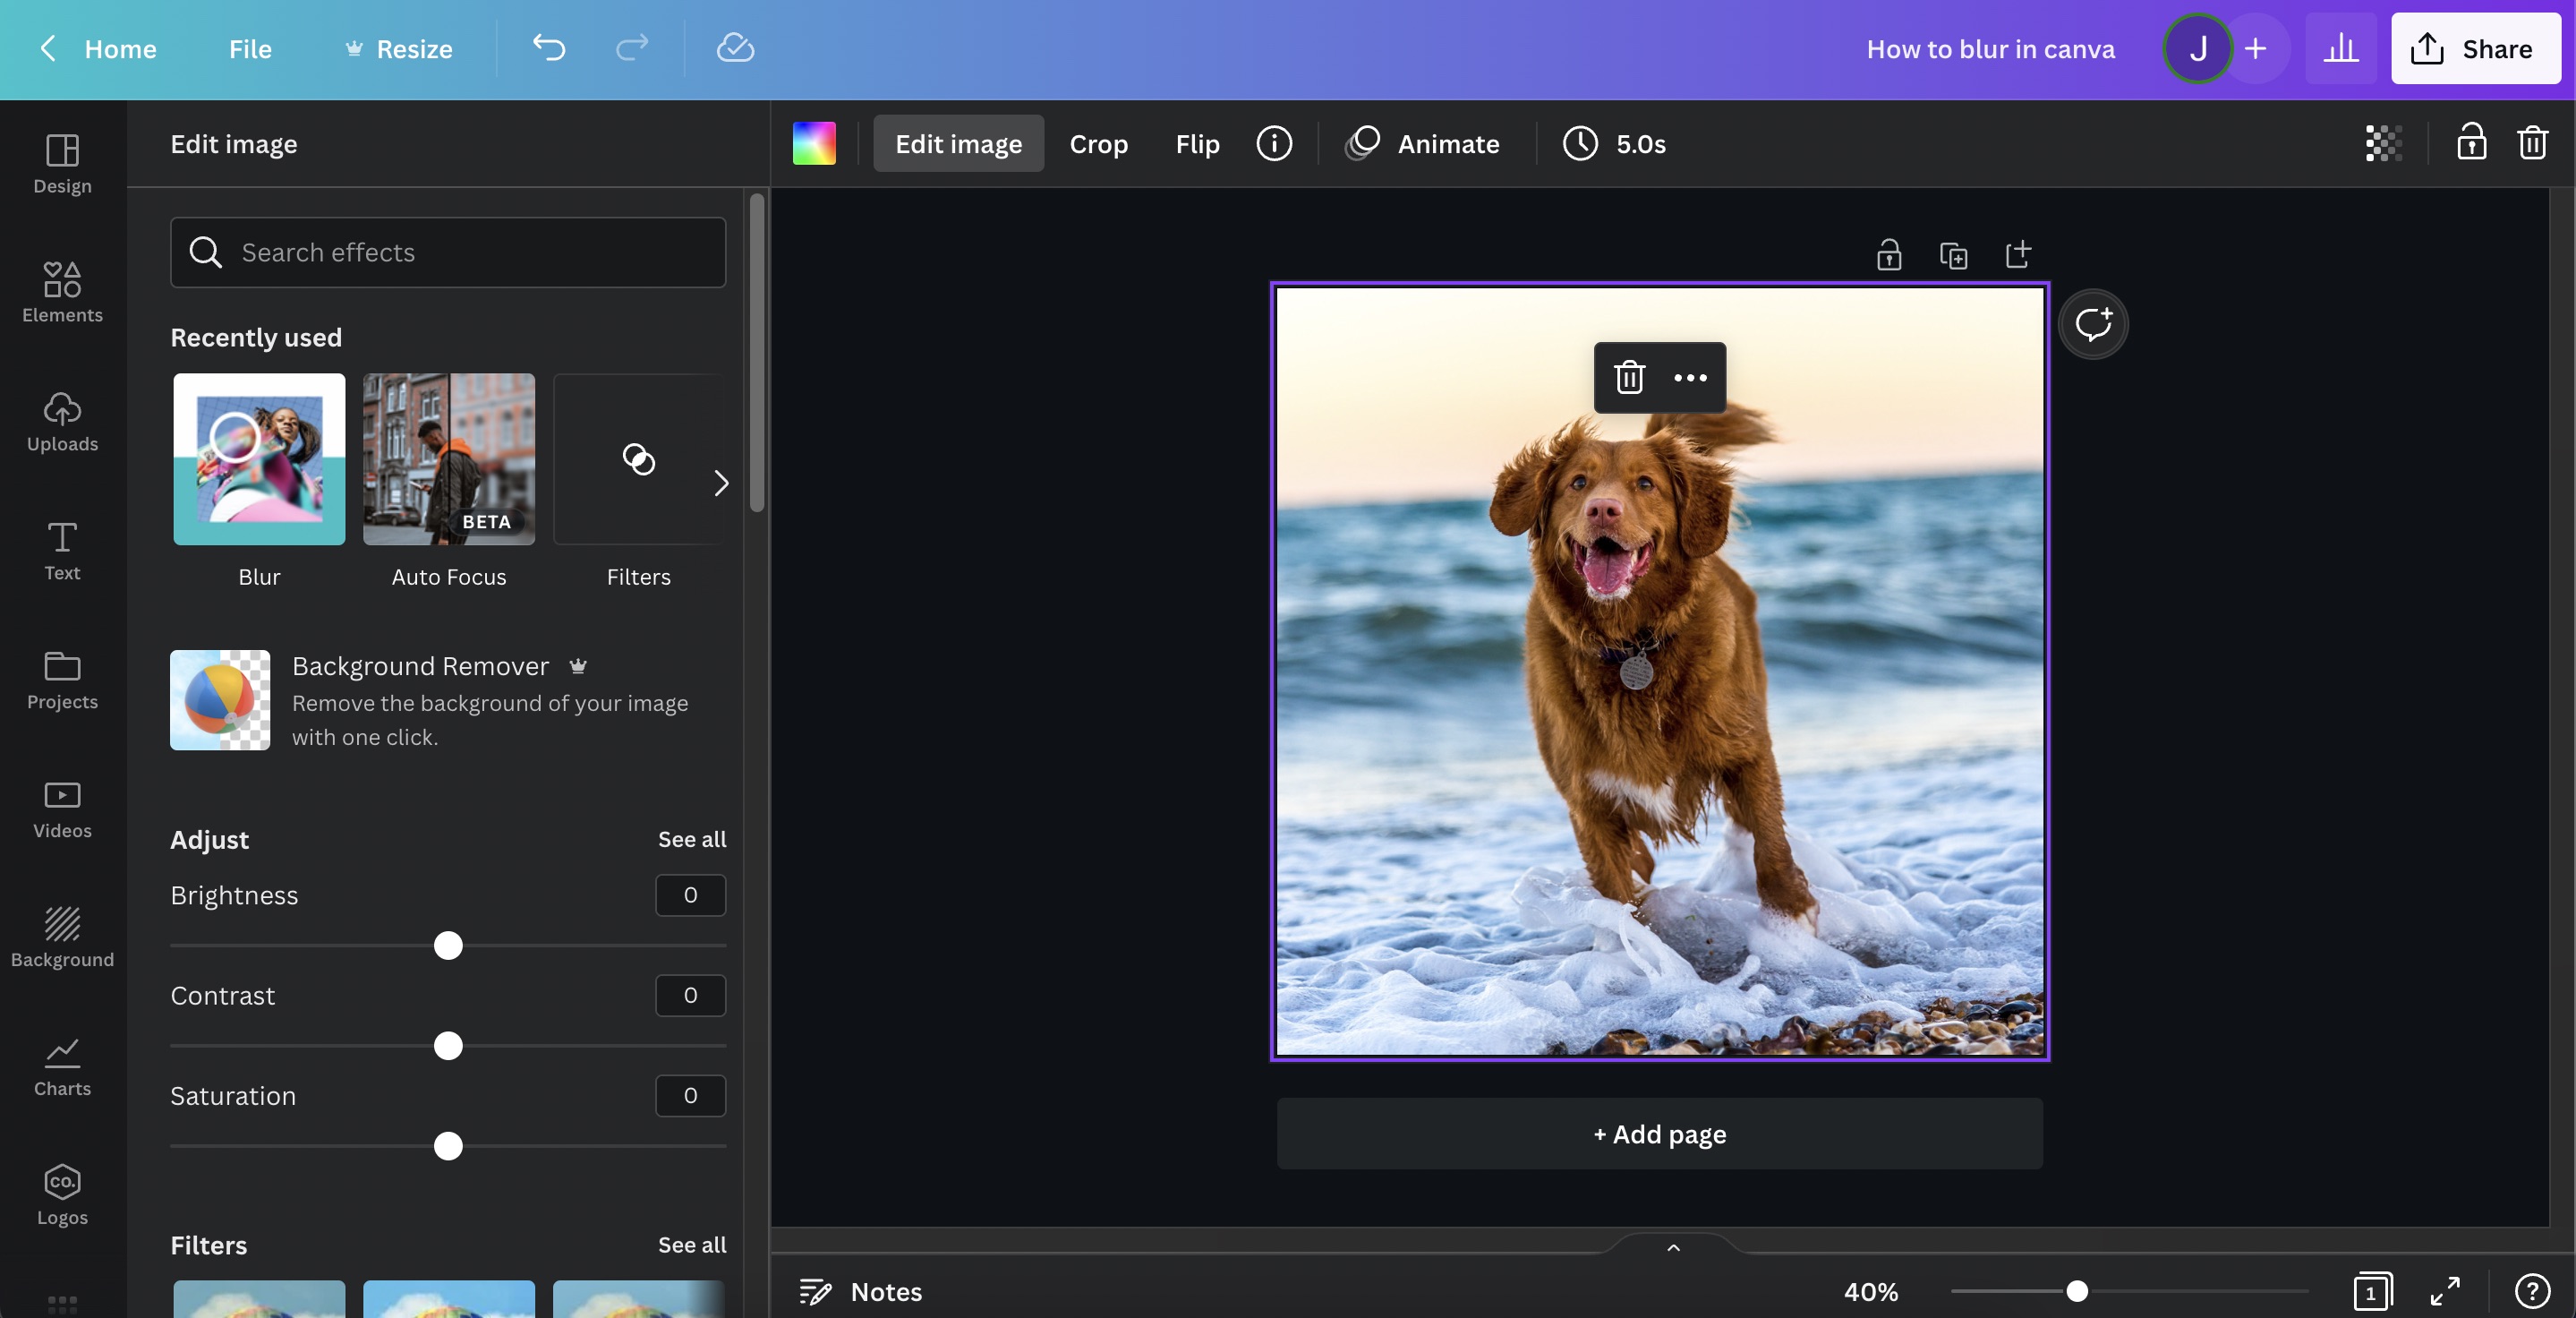
Step 3: Choose “Blur” from Canva’s tools
You’ll be presented with a sidebar for adding effects to your photo. On the search bar, type in “Blur” and click on the Blur tool.
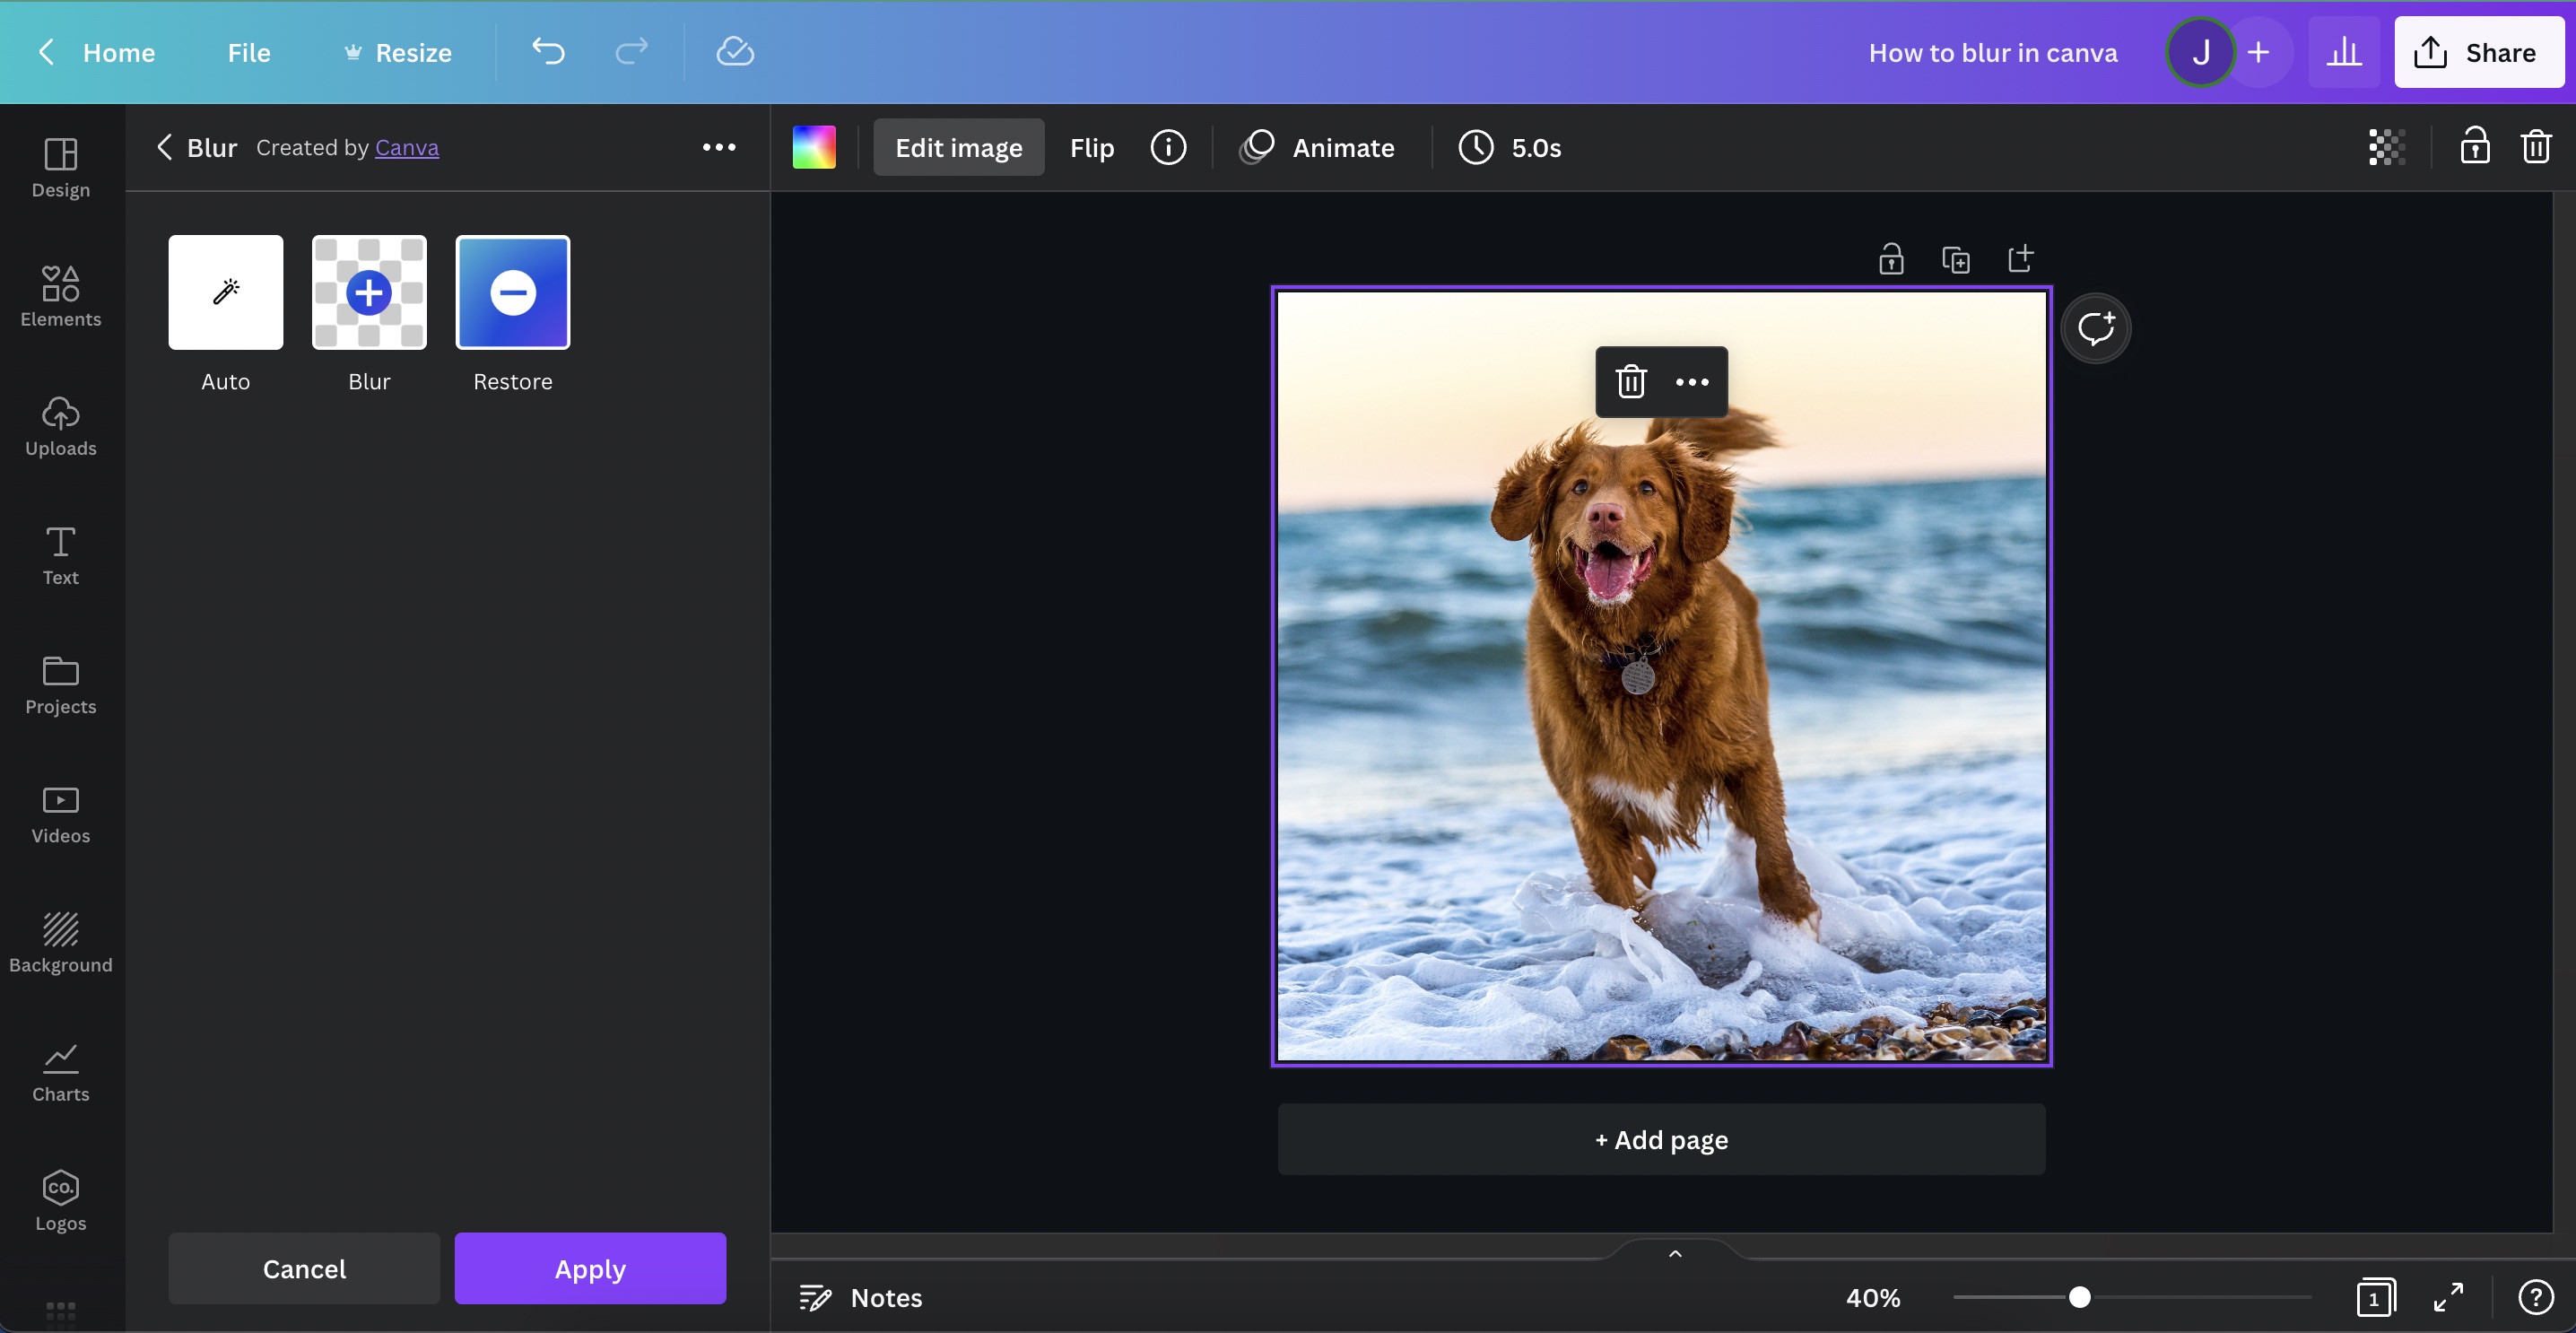
Step 4: Select Auto
The blur tool has three options. Automatic blurring, manual blurring, and restoring clarity. Choose Auto.

Step 5: Adjust Blur Intensity & Apply
Further customize your blur by sliding the intensity bar from left to right.
Quick tip #2: To unblur your image, just click “Auto” and slide the intensity bar to 0.
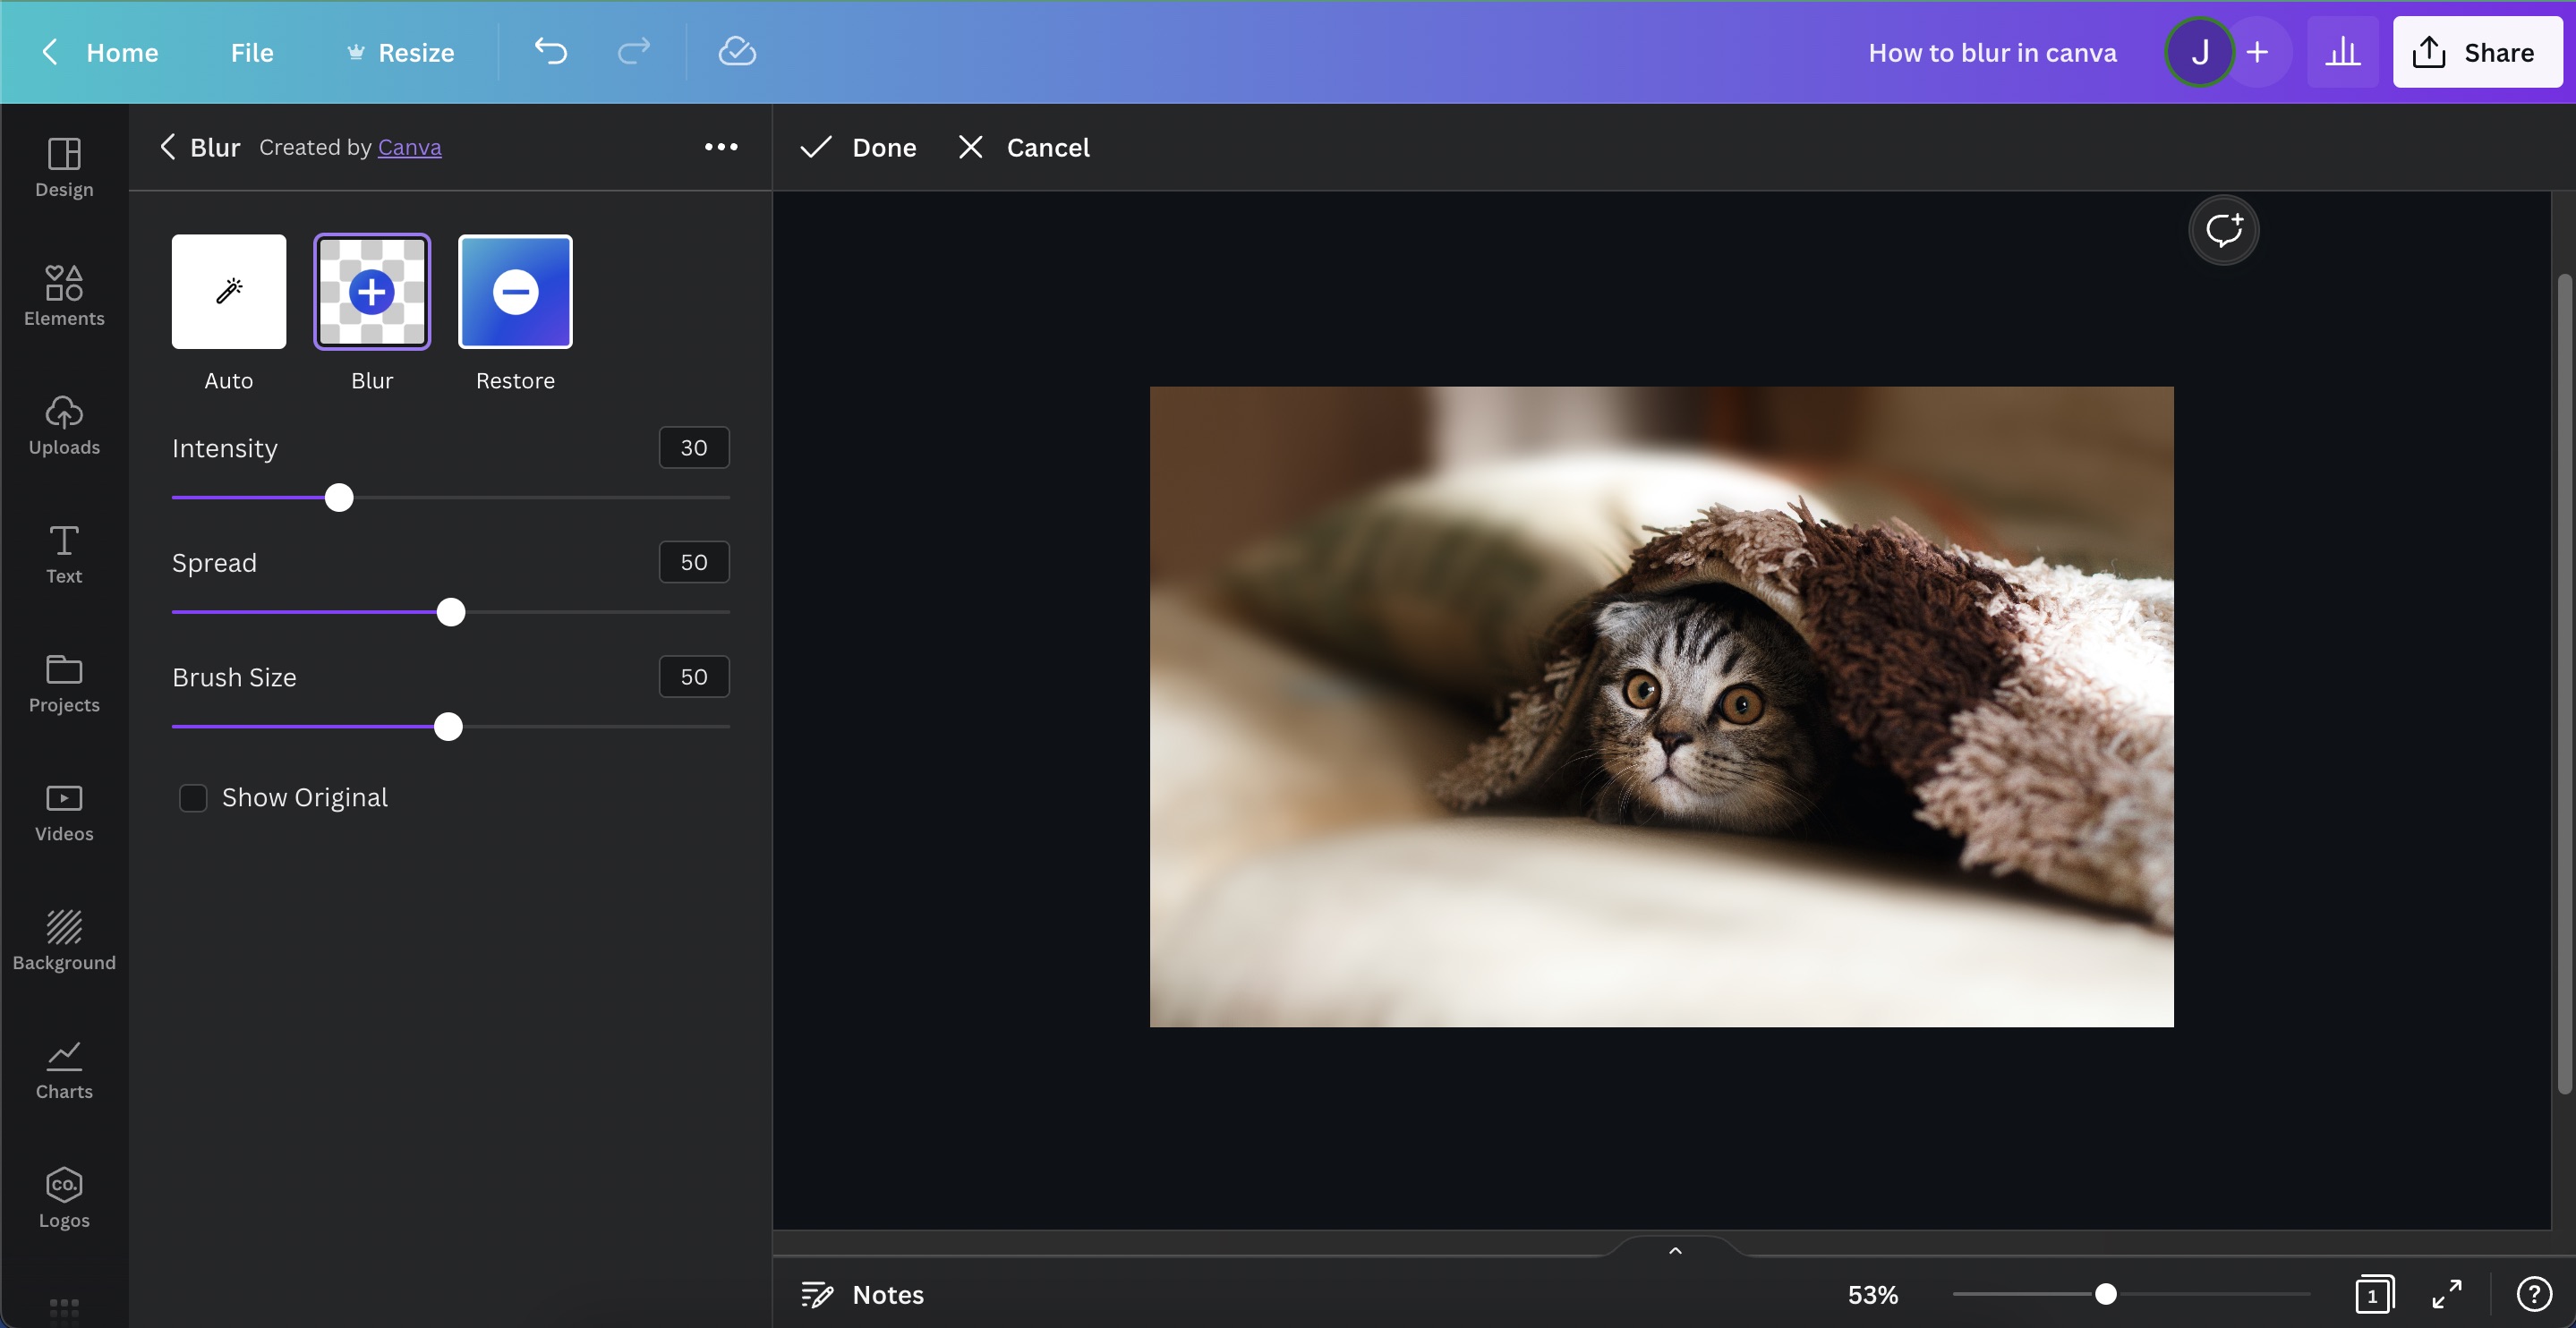
How to blur parts of a photo in Canva
To blur only a portion of an image, all you have to do is select the photo > click “Effects” > choose the blur tool > pick blur > adjust blur intensity, spread, and brush size > brush across the area you want to blur > apply changes.
Step 1: Select Your Photo
Selecting / clicking the photo lets Canva know that you want to edit it.
Step 2: Click “Edit Image”
By clicking on an element (in this case, a photo), you bring up editing tools for it. For this step, click on "Edit Image".
Step 3: Choose “Blur” from Canva’s tools
You’ll be presented with a sidebar for adding effects to your photo. On the search bar, type in “Blur” and click on the Blur tool.
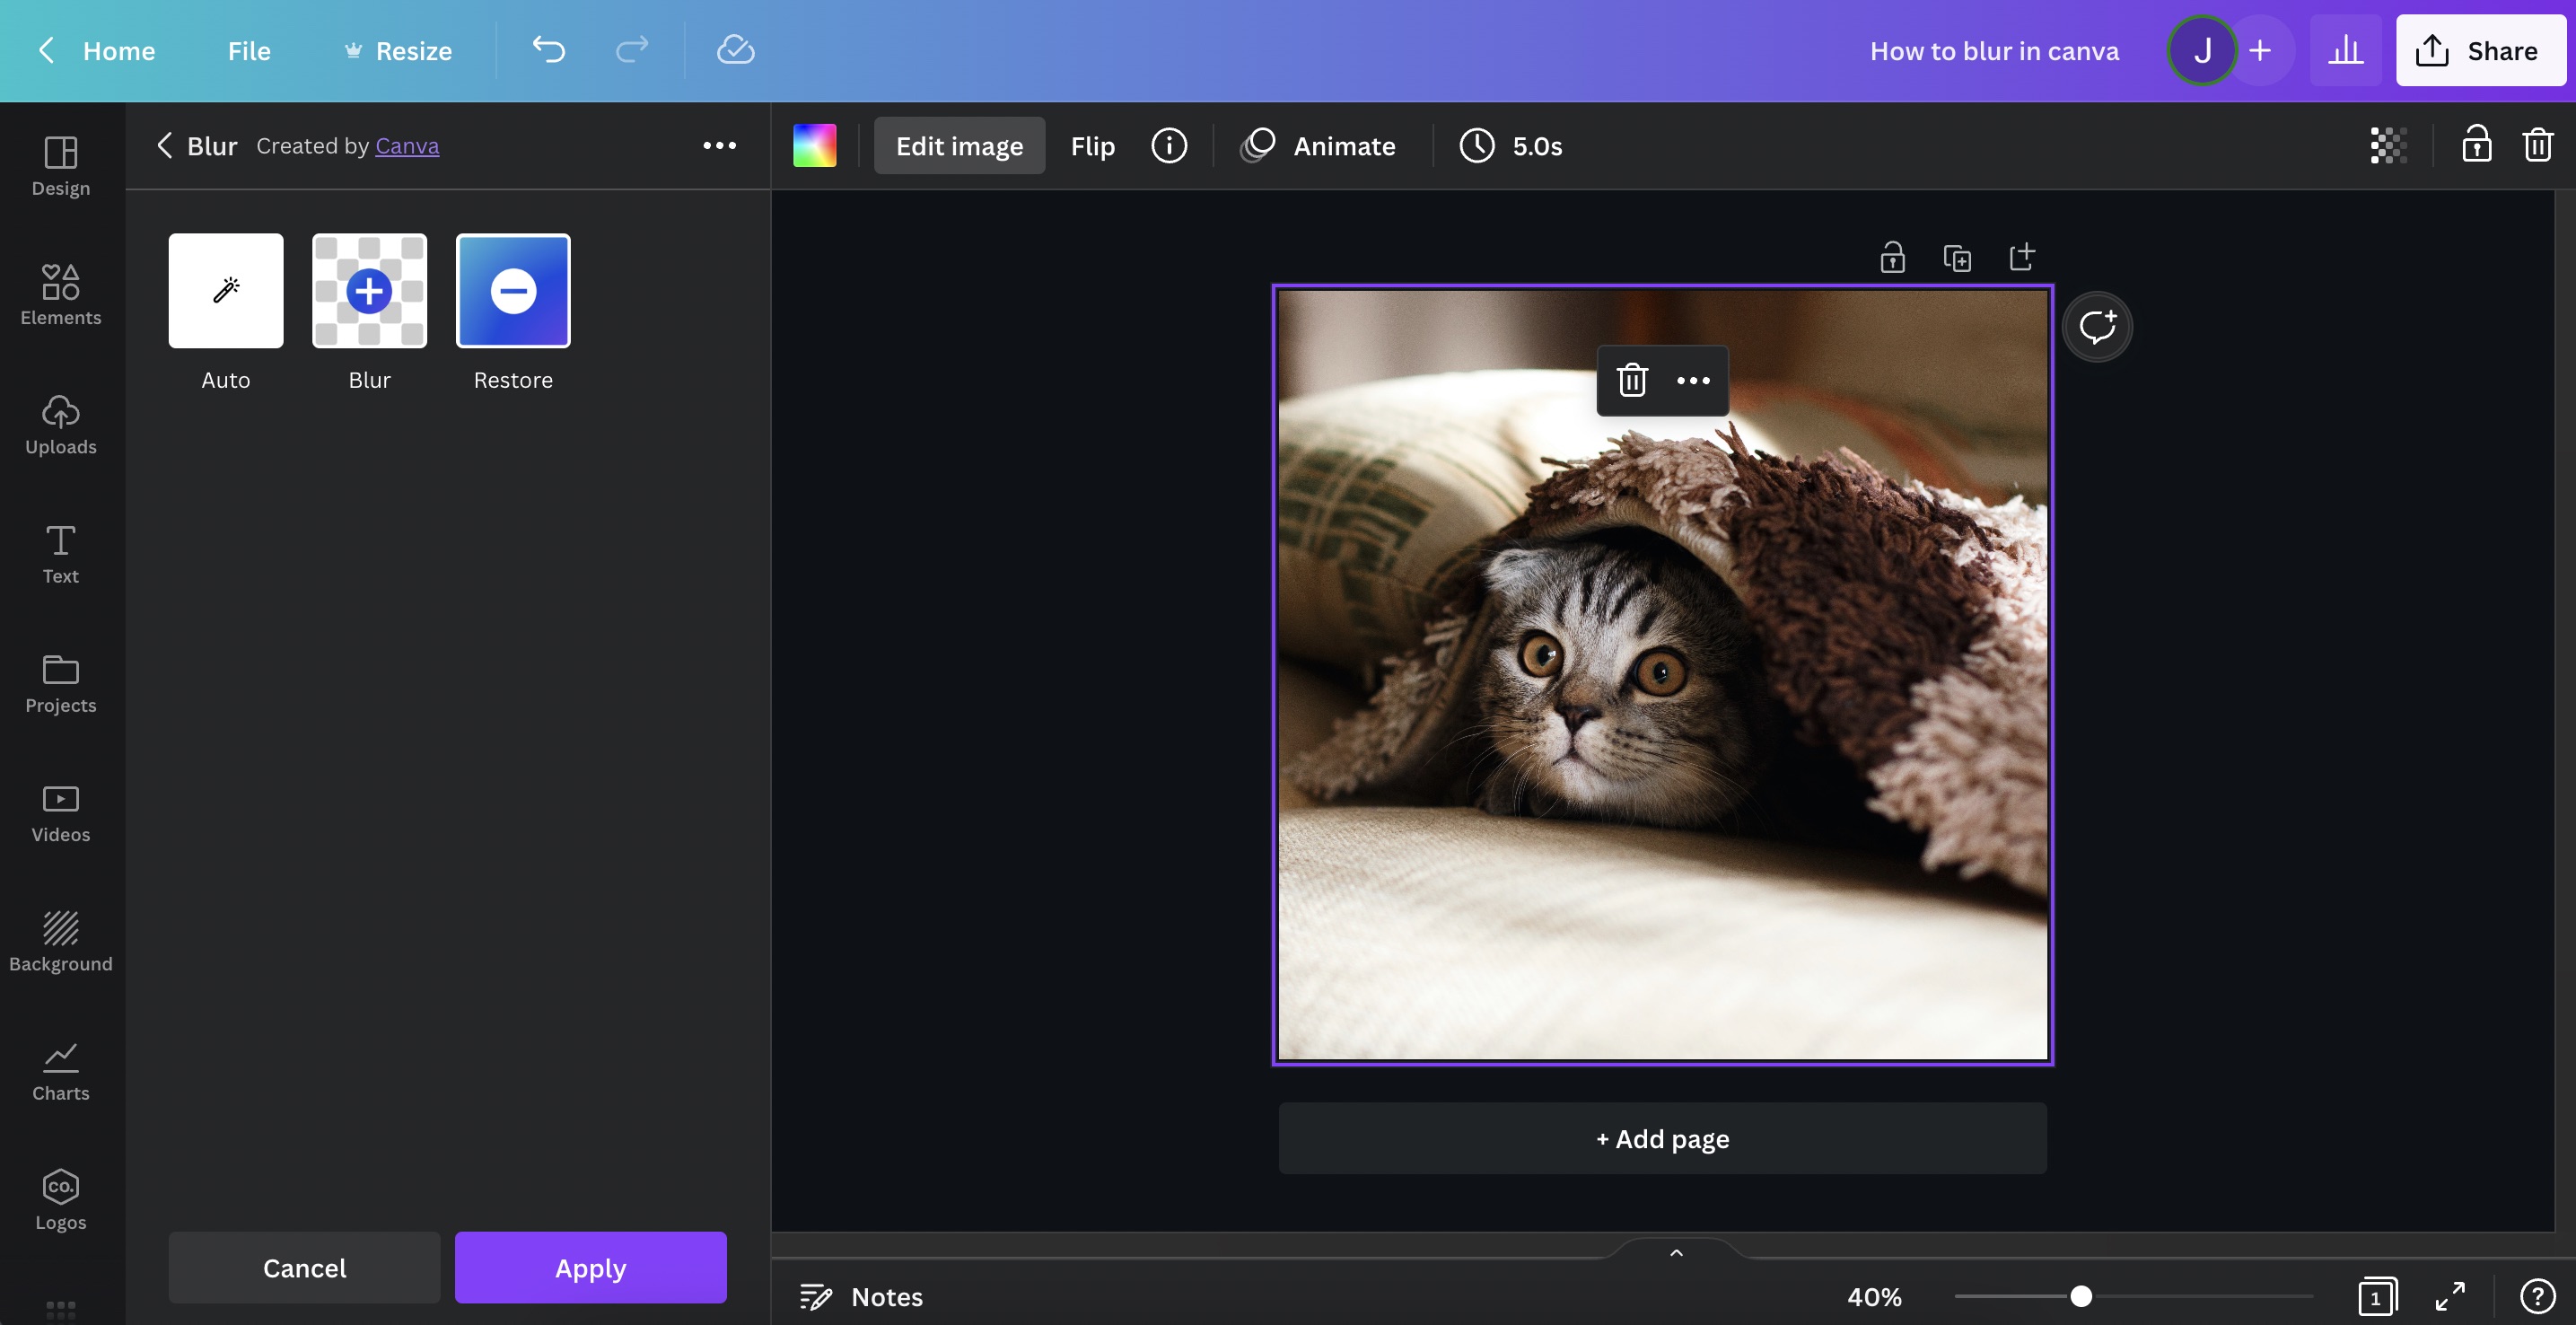
Step 4: Select Blur
The blur tool has three options: Auto, Blur, and Restore. Choosing Blur will let you use a brush to blur specific portions of an image.

Step 5: Adjust Brush Settings
The way Canva does portion blurring is with a digital brush. Here, you can adjust the blur’s intensity, spread, and brush size.
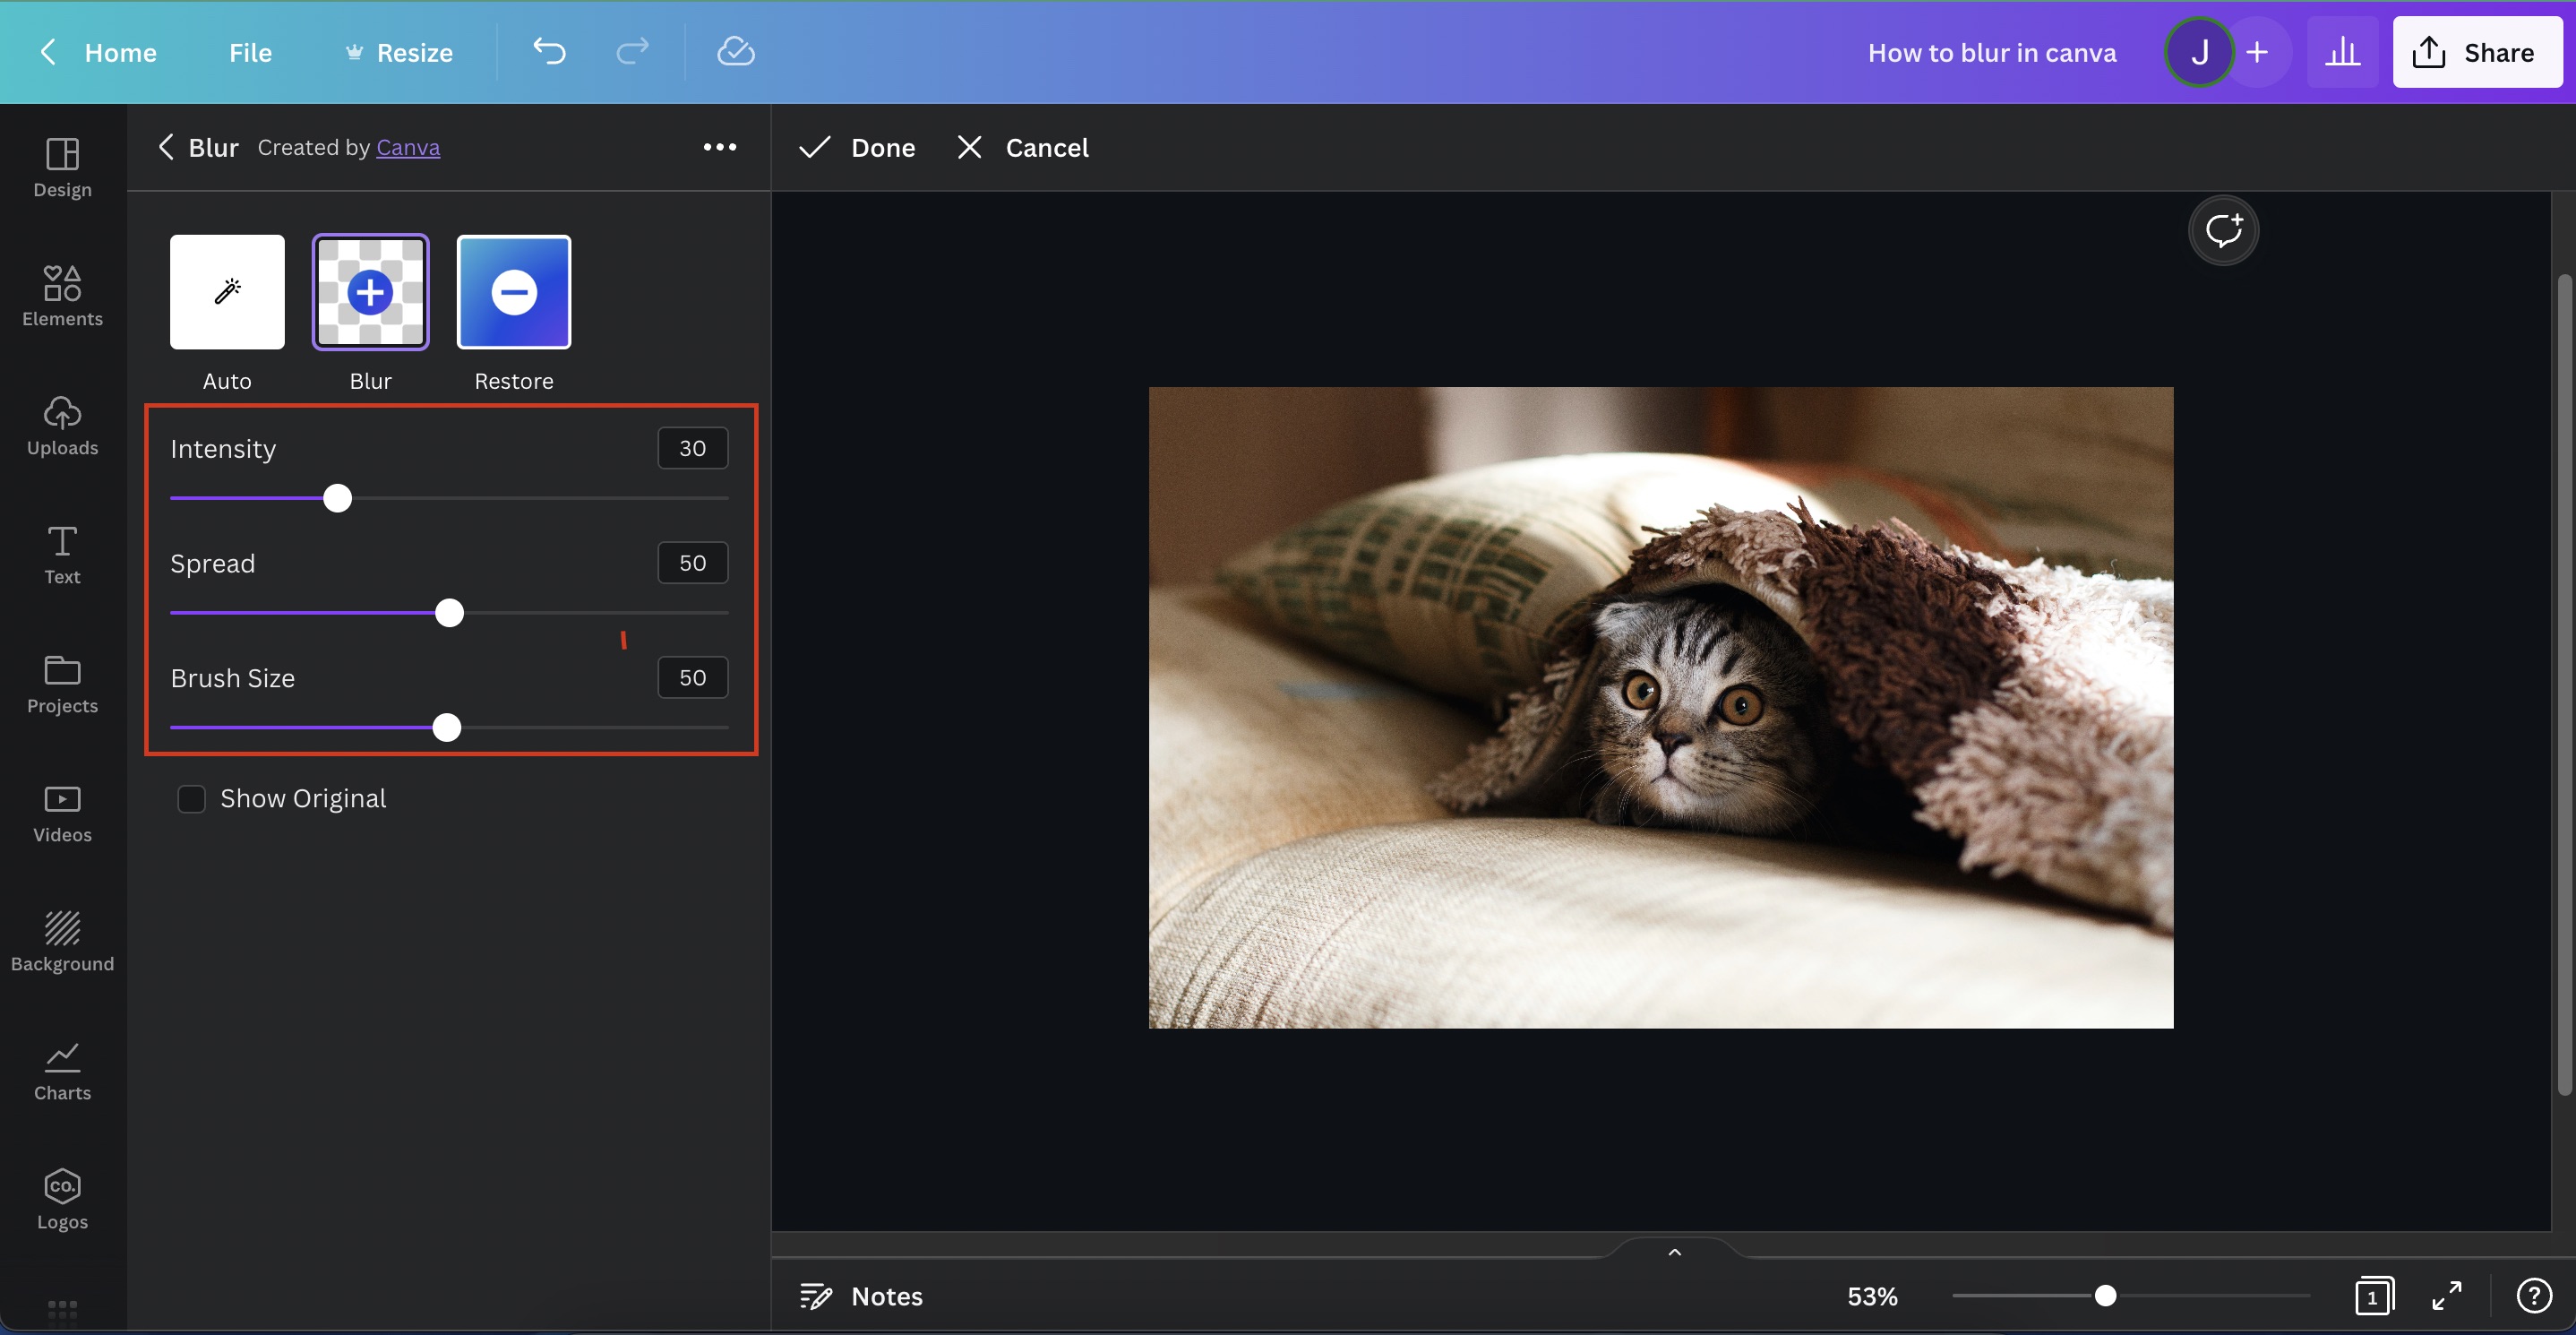
Step 6: Blur and Apply
Drag and hold your cursor toward the area of the image you want to blur. To accurately blur your image, I suggest playing around with the brush size and Canva’s zoom feature.
Quick tip #3: Restore image clarity by clicking “Restore” and running your brush across affected areas.
How to blur photos like Portrait Mode in Canva
Canva has a tool that mimics the iOS and Android camera feature “Portrait Mode,” where everything except the subject is blurred out. This is useful if you want to bring more focus to the photo’s subject or make texts stand out.
Quick tip #4: You cannot restore the image once applying the Portrait Mode blur. So make sure to duplicate the image beforehand.
Step 1: Select Your Photo
Just like the two other methods, you first have to click on the photo to select it.
Step 2: Click “Edit Image”
Find "Edit Image" on the newly shown toolbar on top.
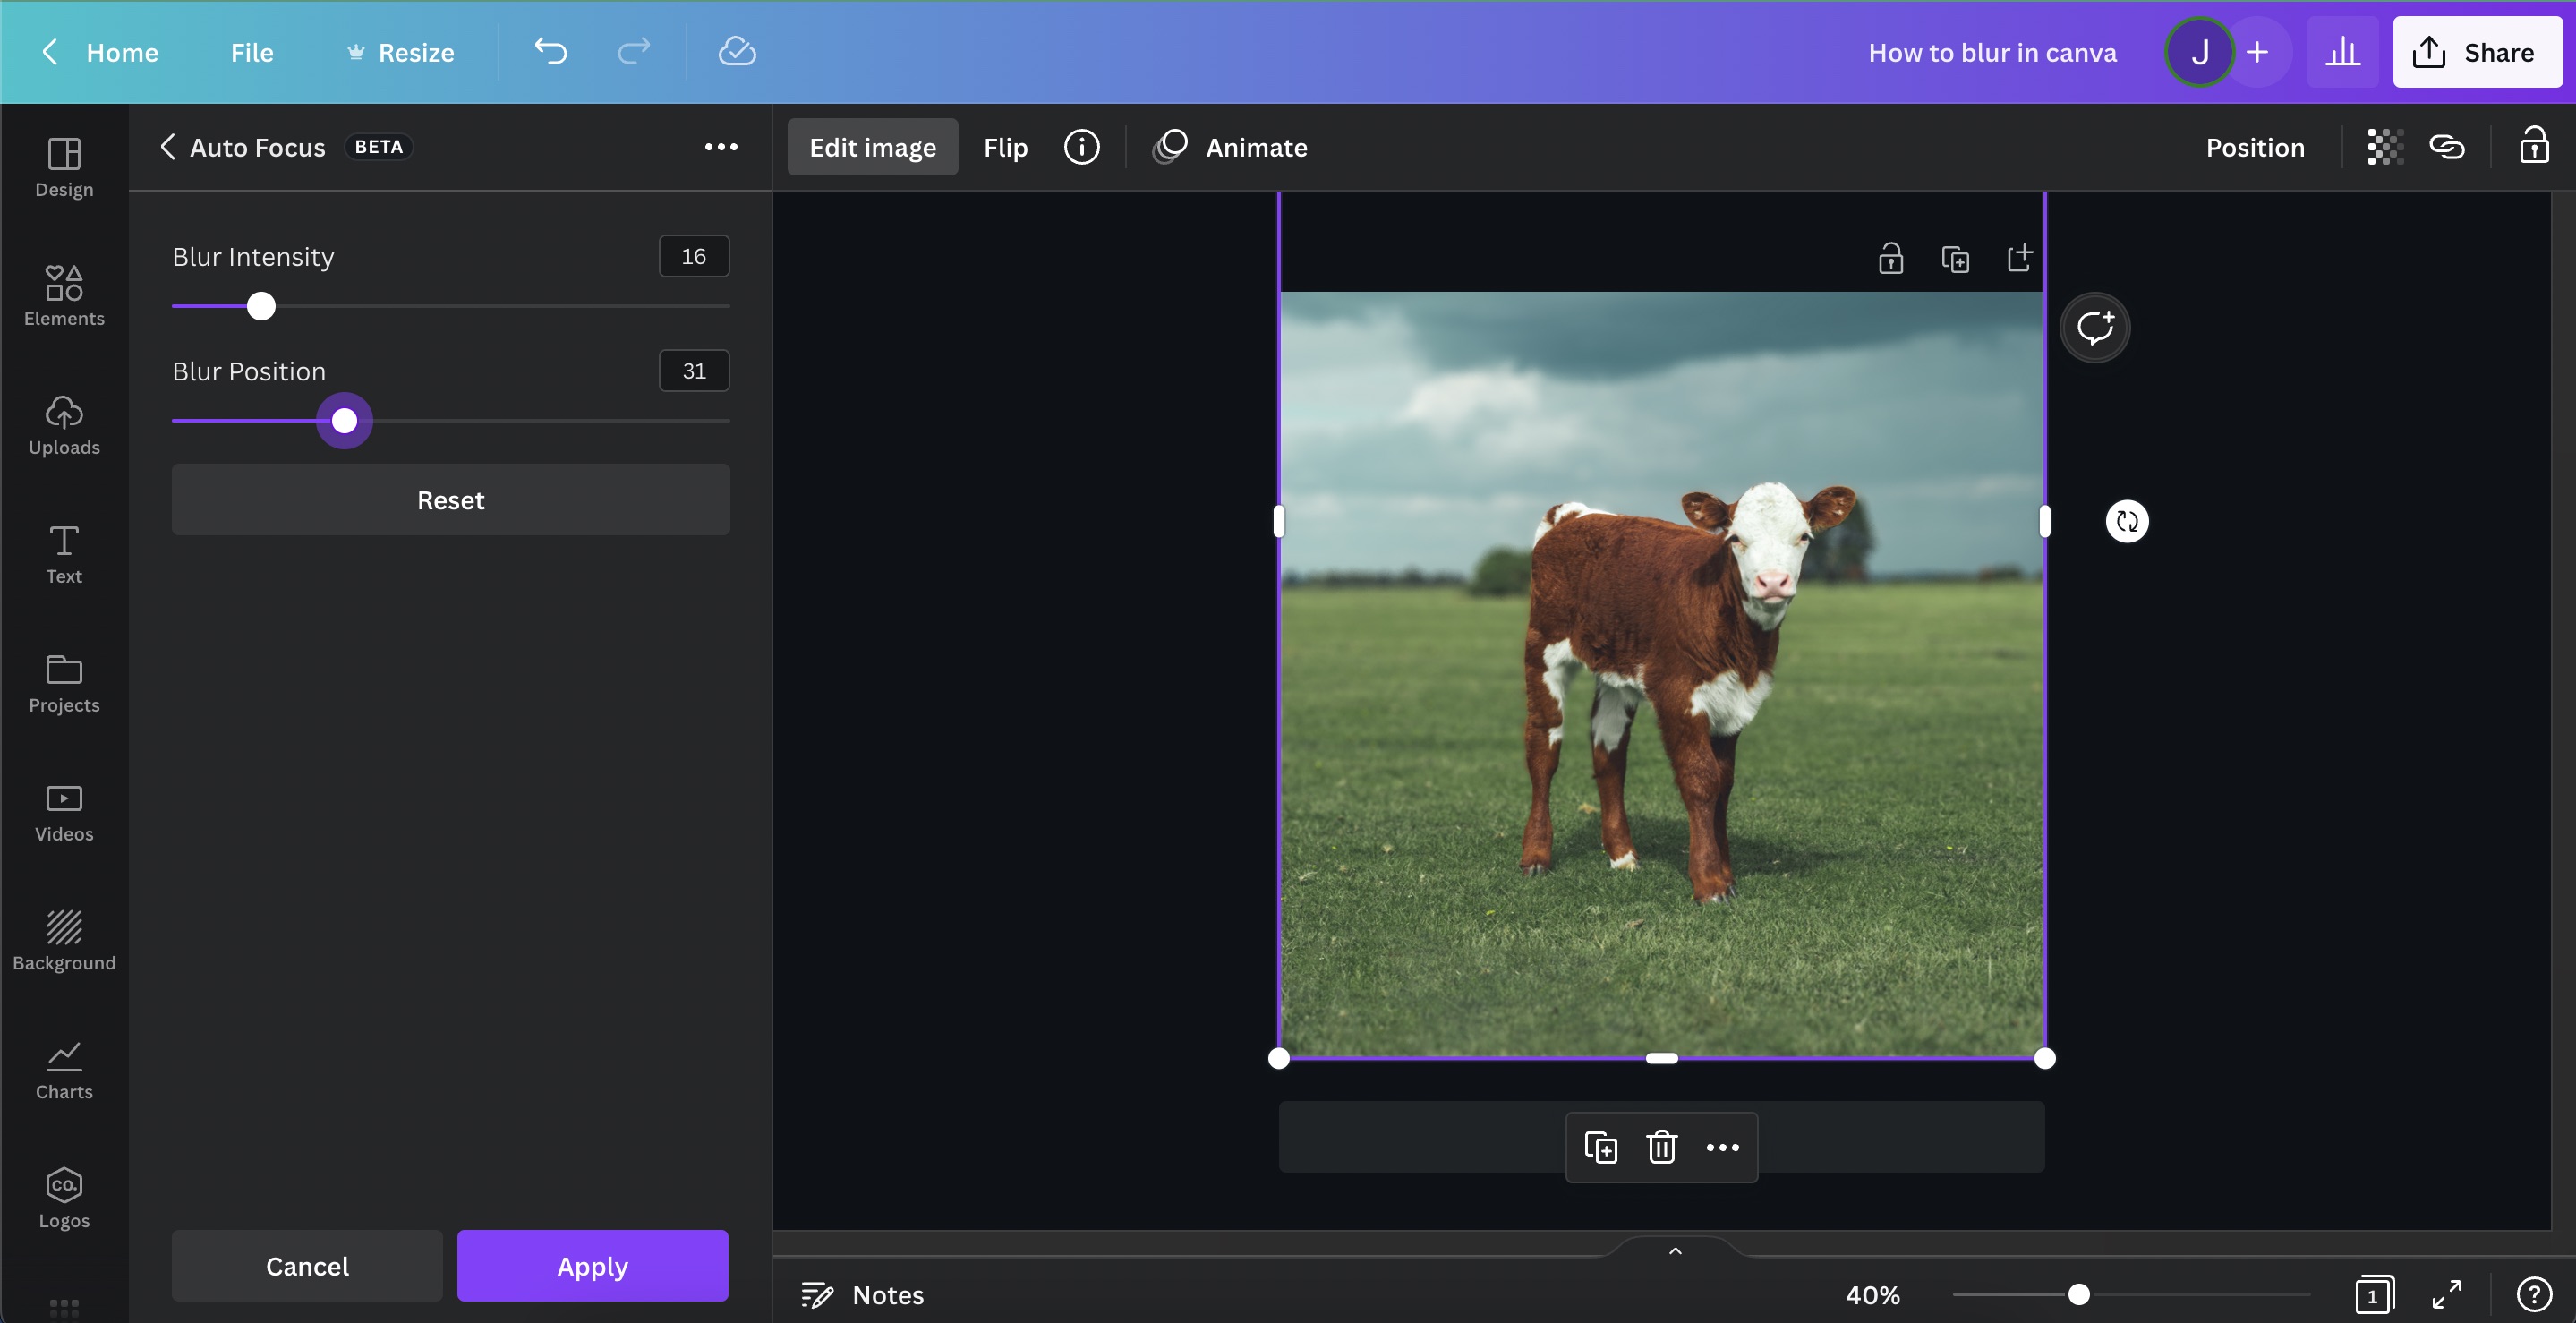
Step 3: Find and Choose “Auto Focus”
On the Effects sidebar, search for the tool “Auto Focus”.
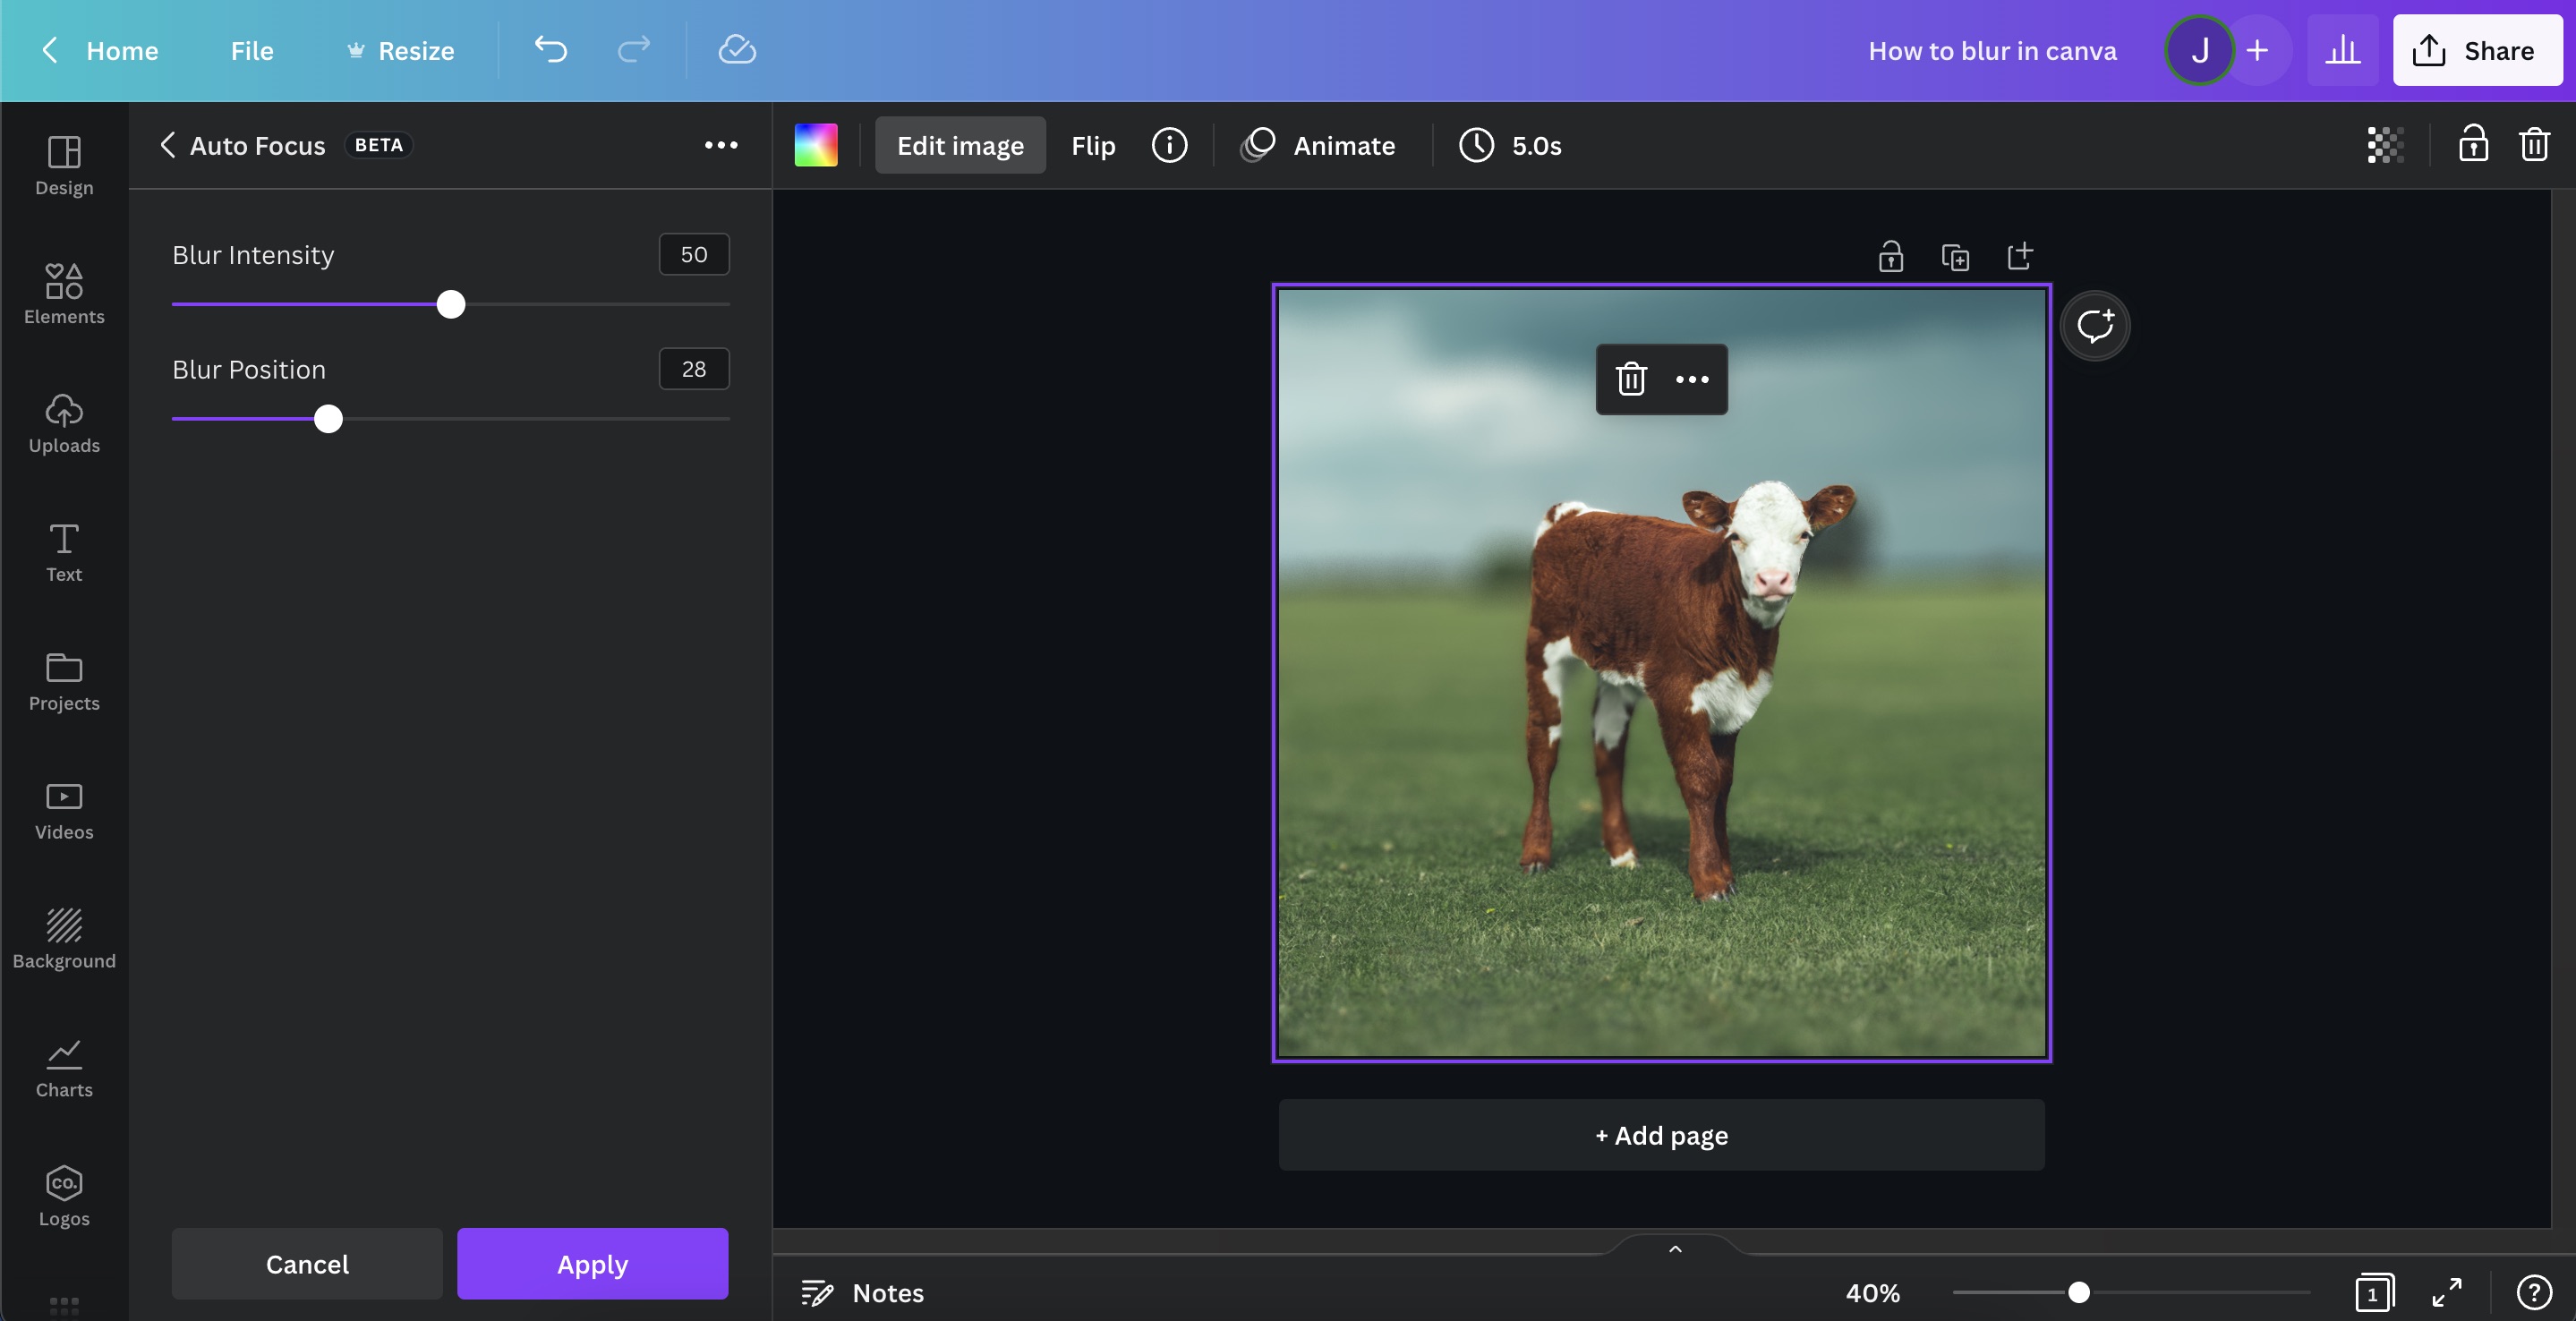
Step 4: Adjust Blur Intensity & Depth and Click Apply
Once you’ve clicked on “Auto Focus”, you are presented with two sliders, intensity and position. Position is the depth of how “far” you want to blur an image.
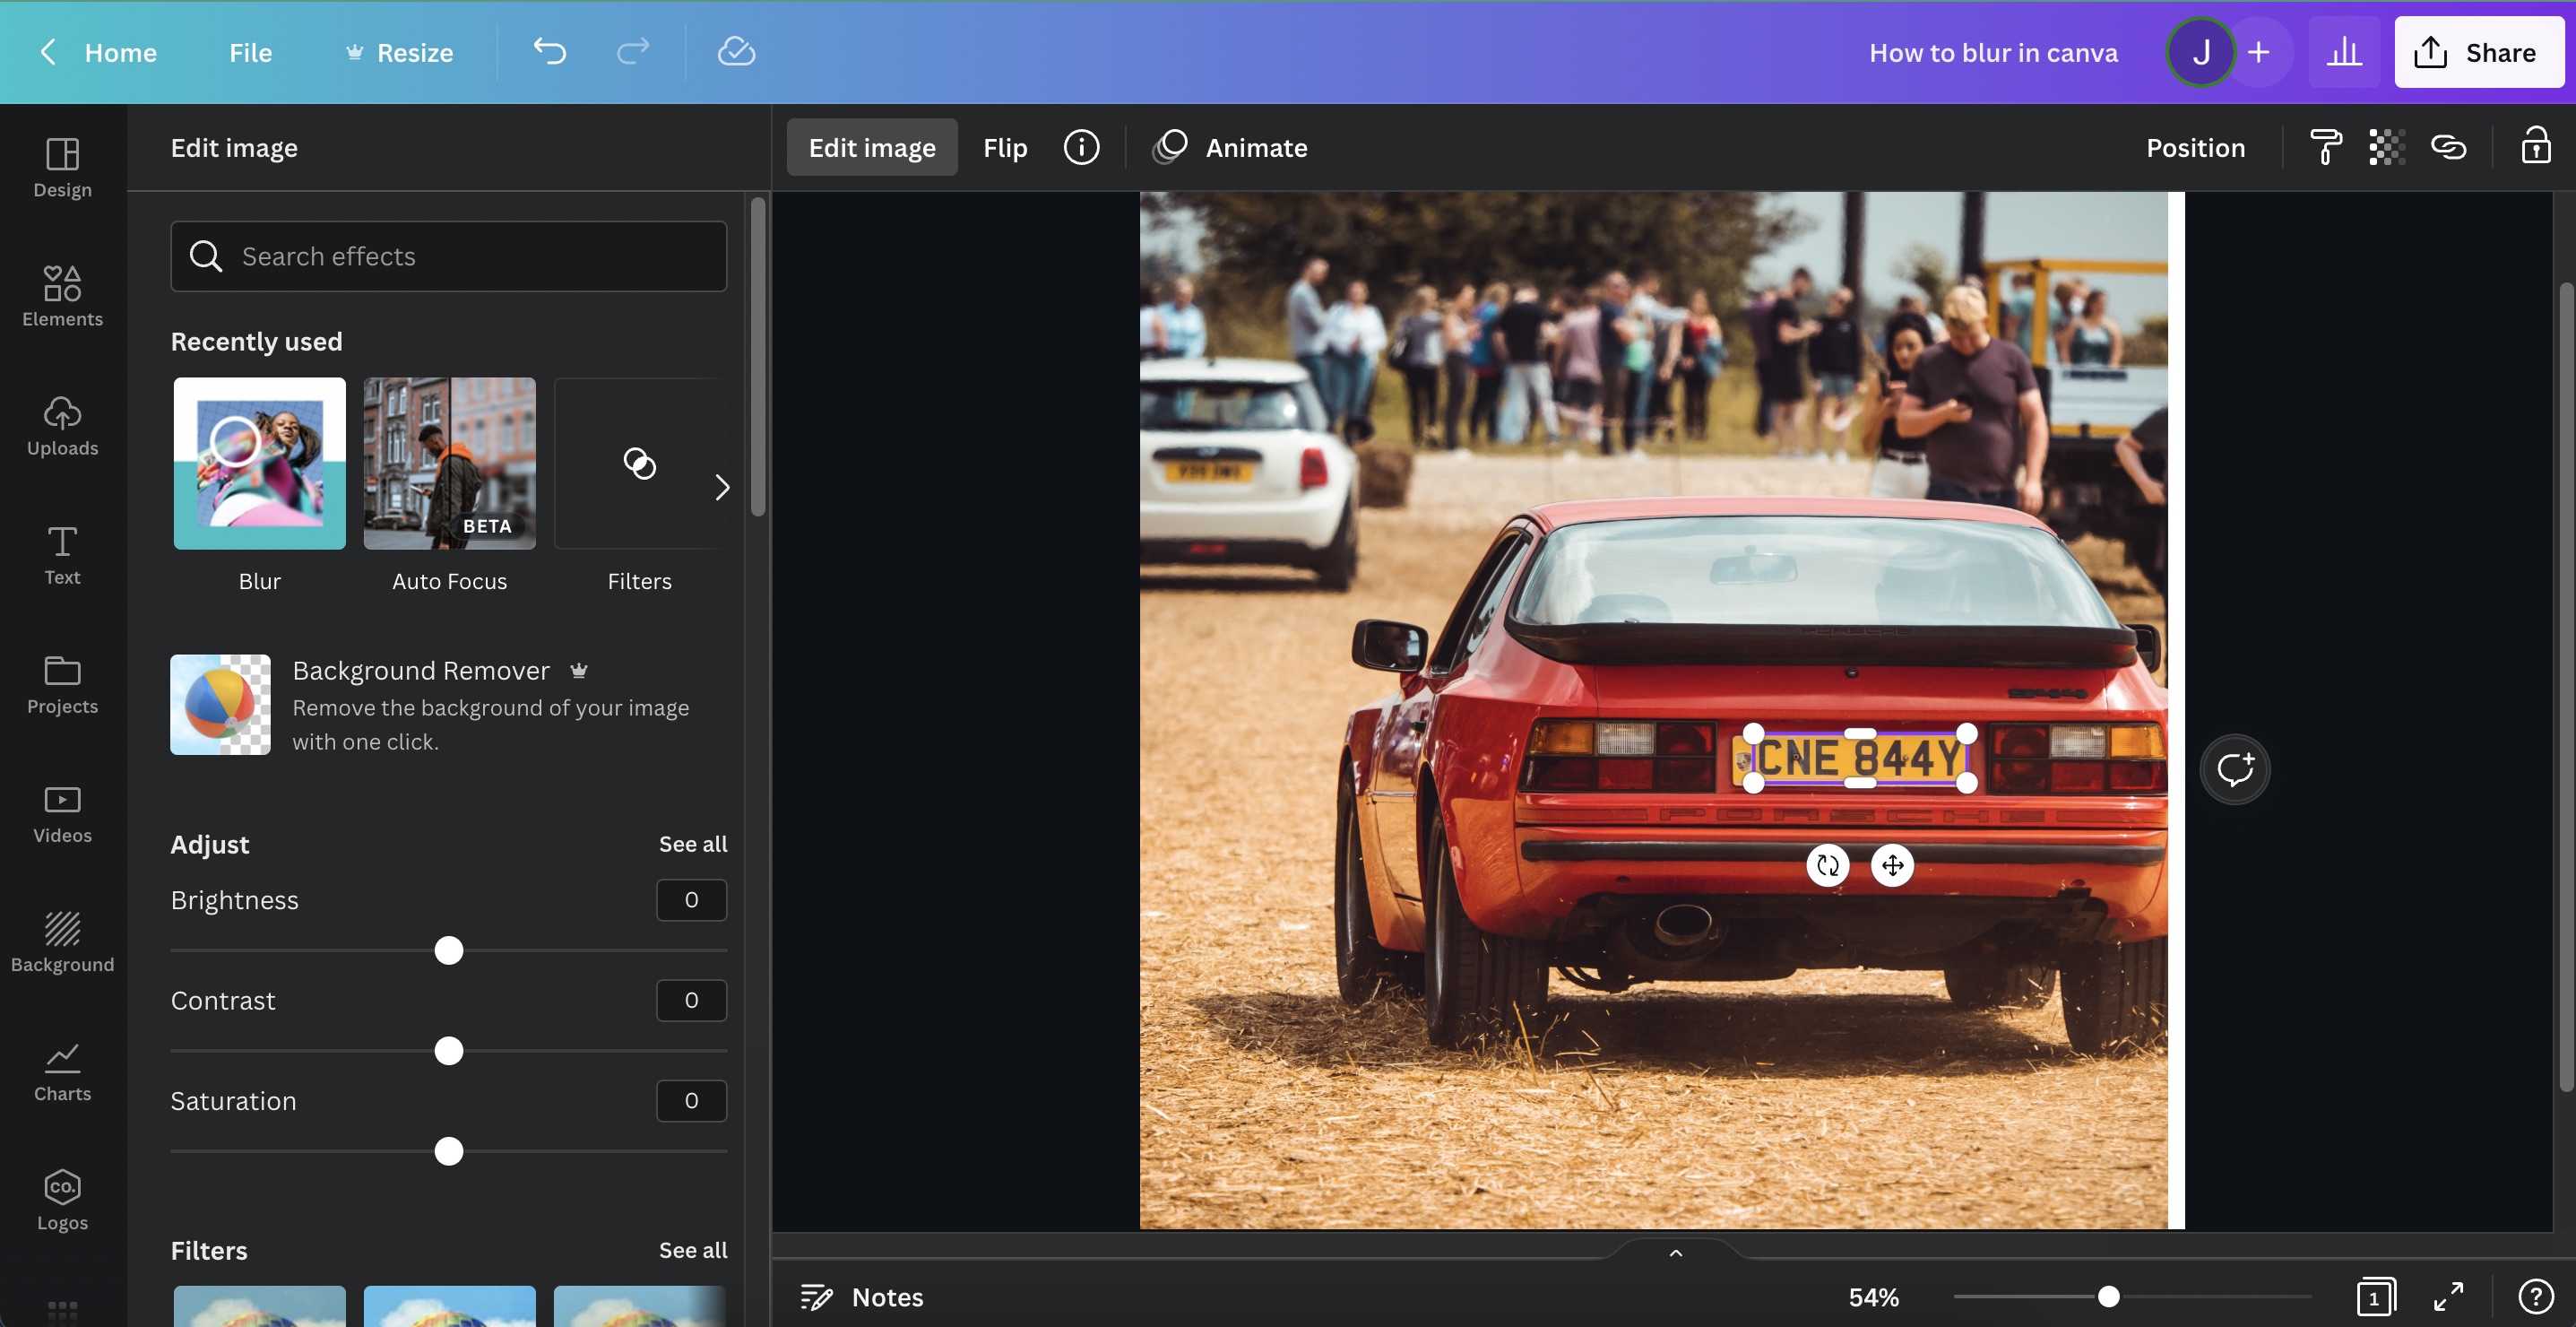
How to blur sensitive information on photos in Canva
Some photos may have sensitive information you’d want to blur out, like license plates or addresses. For this, you just have to blur a portion of a photo. However, for this, it’s best to only set the blur intensity at a maximum of 7.
Step 1: Select Your Photo
Click on the photo with sensitive informtion you wish to remove.

Step 2: Duplicate the Photo
To duplicate a photo, either click on the 3 dots shown or right-click the image, then choose Duplicate.
Note that when you size your image to the entire page, Canva thinks that you want it as a background, therefore removing the Duplicate option. In order to resolve this, simply right-click on the image and choose Detach Image from Background.

Step 3: Resize to Fit the Text
Resize the duplicate photo until only the text you wish to blur is left. Make sure to align it to the original image as if it's invisible.

Step 4: Edit Duplicate Image
Once that's done, click on your duplicate image and choose Edit Image.
Step 5: Choose Blur
In the new side panel, choose Blur under the fx Effects category.
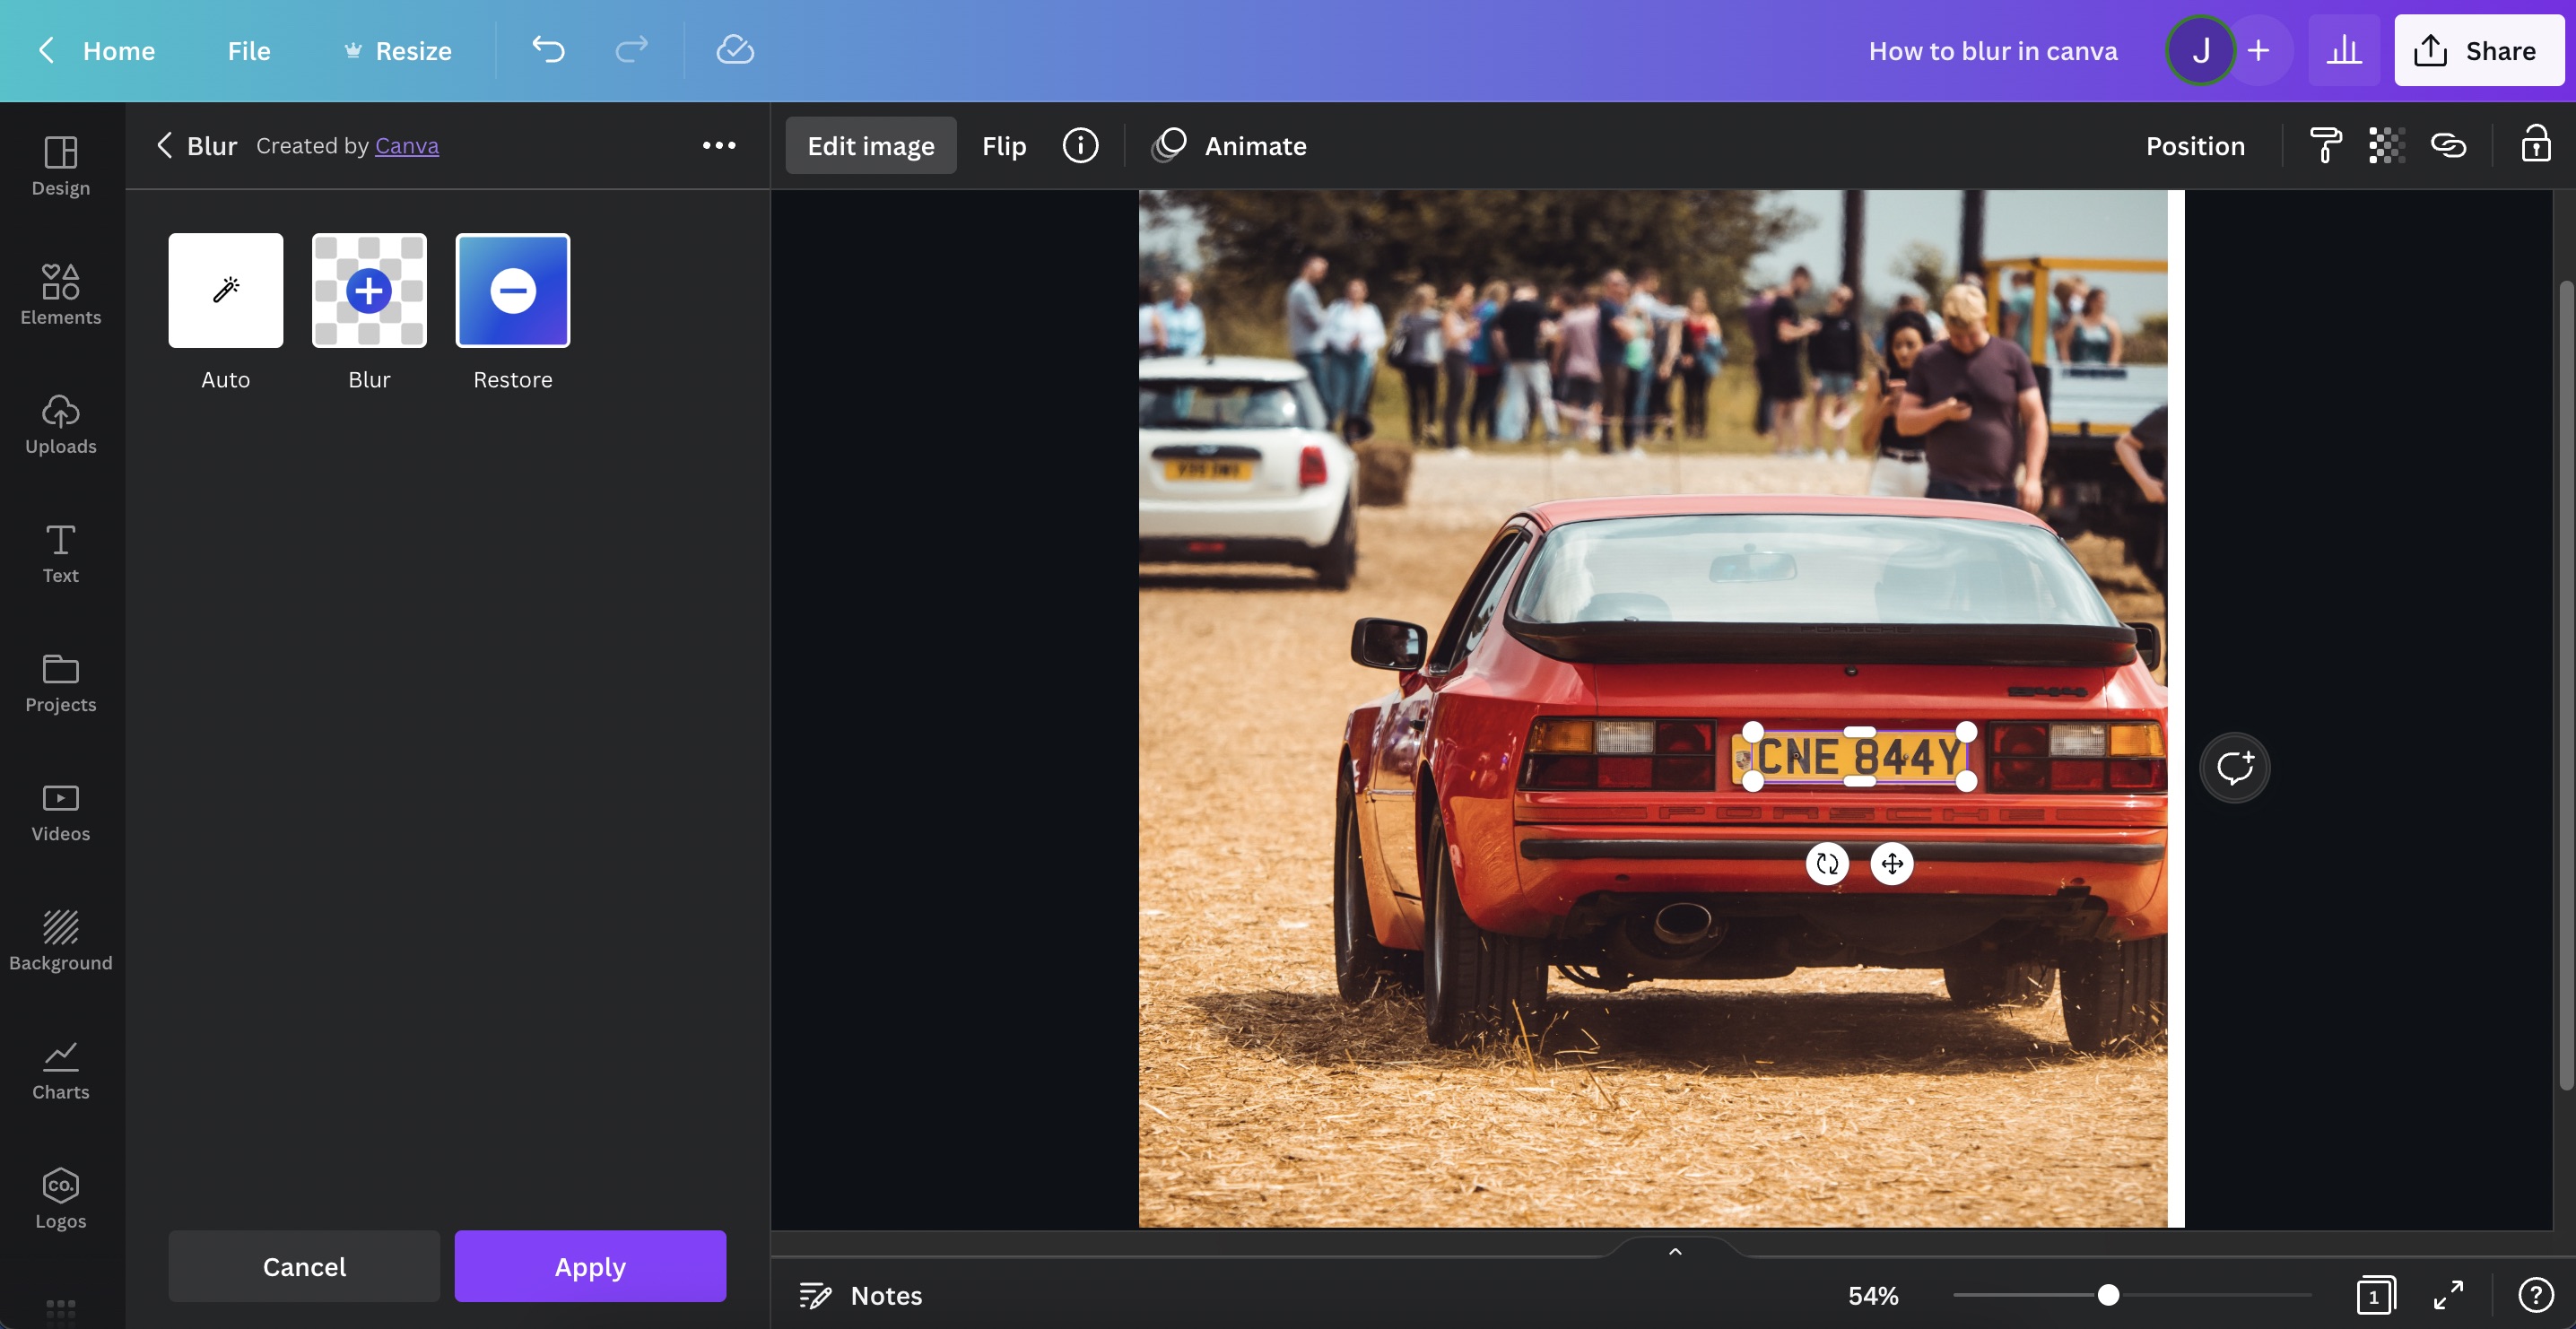
Step 6: Choose Auto
You'd want to blur the entire cropped Duplicate image, so let's choose Auto.
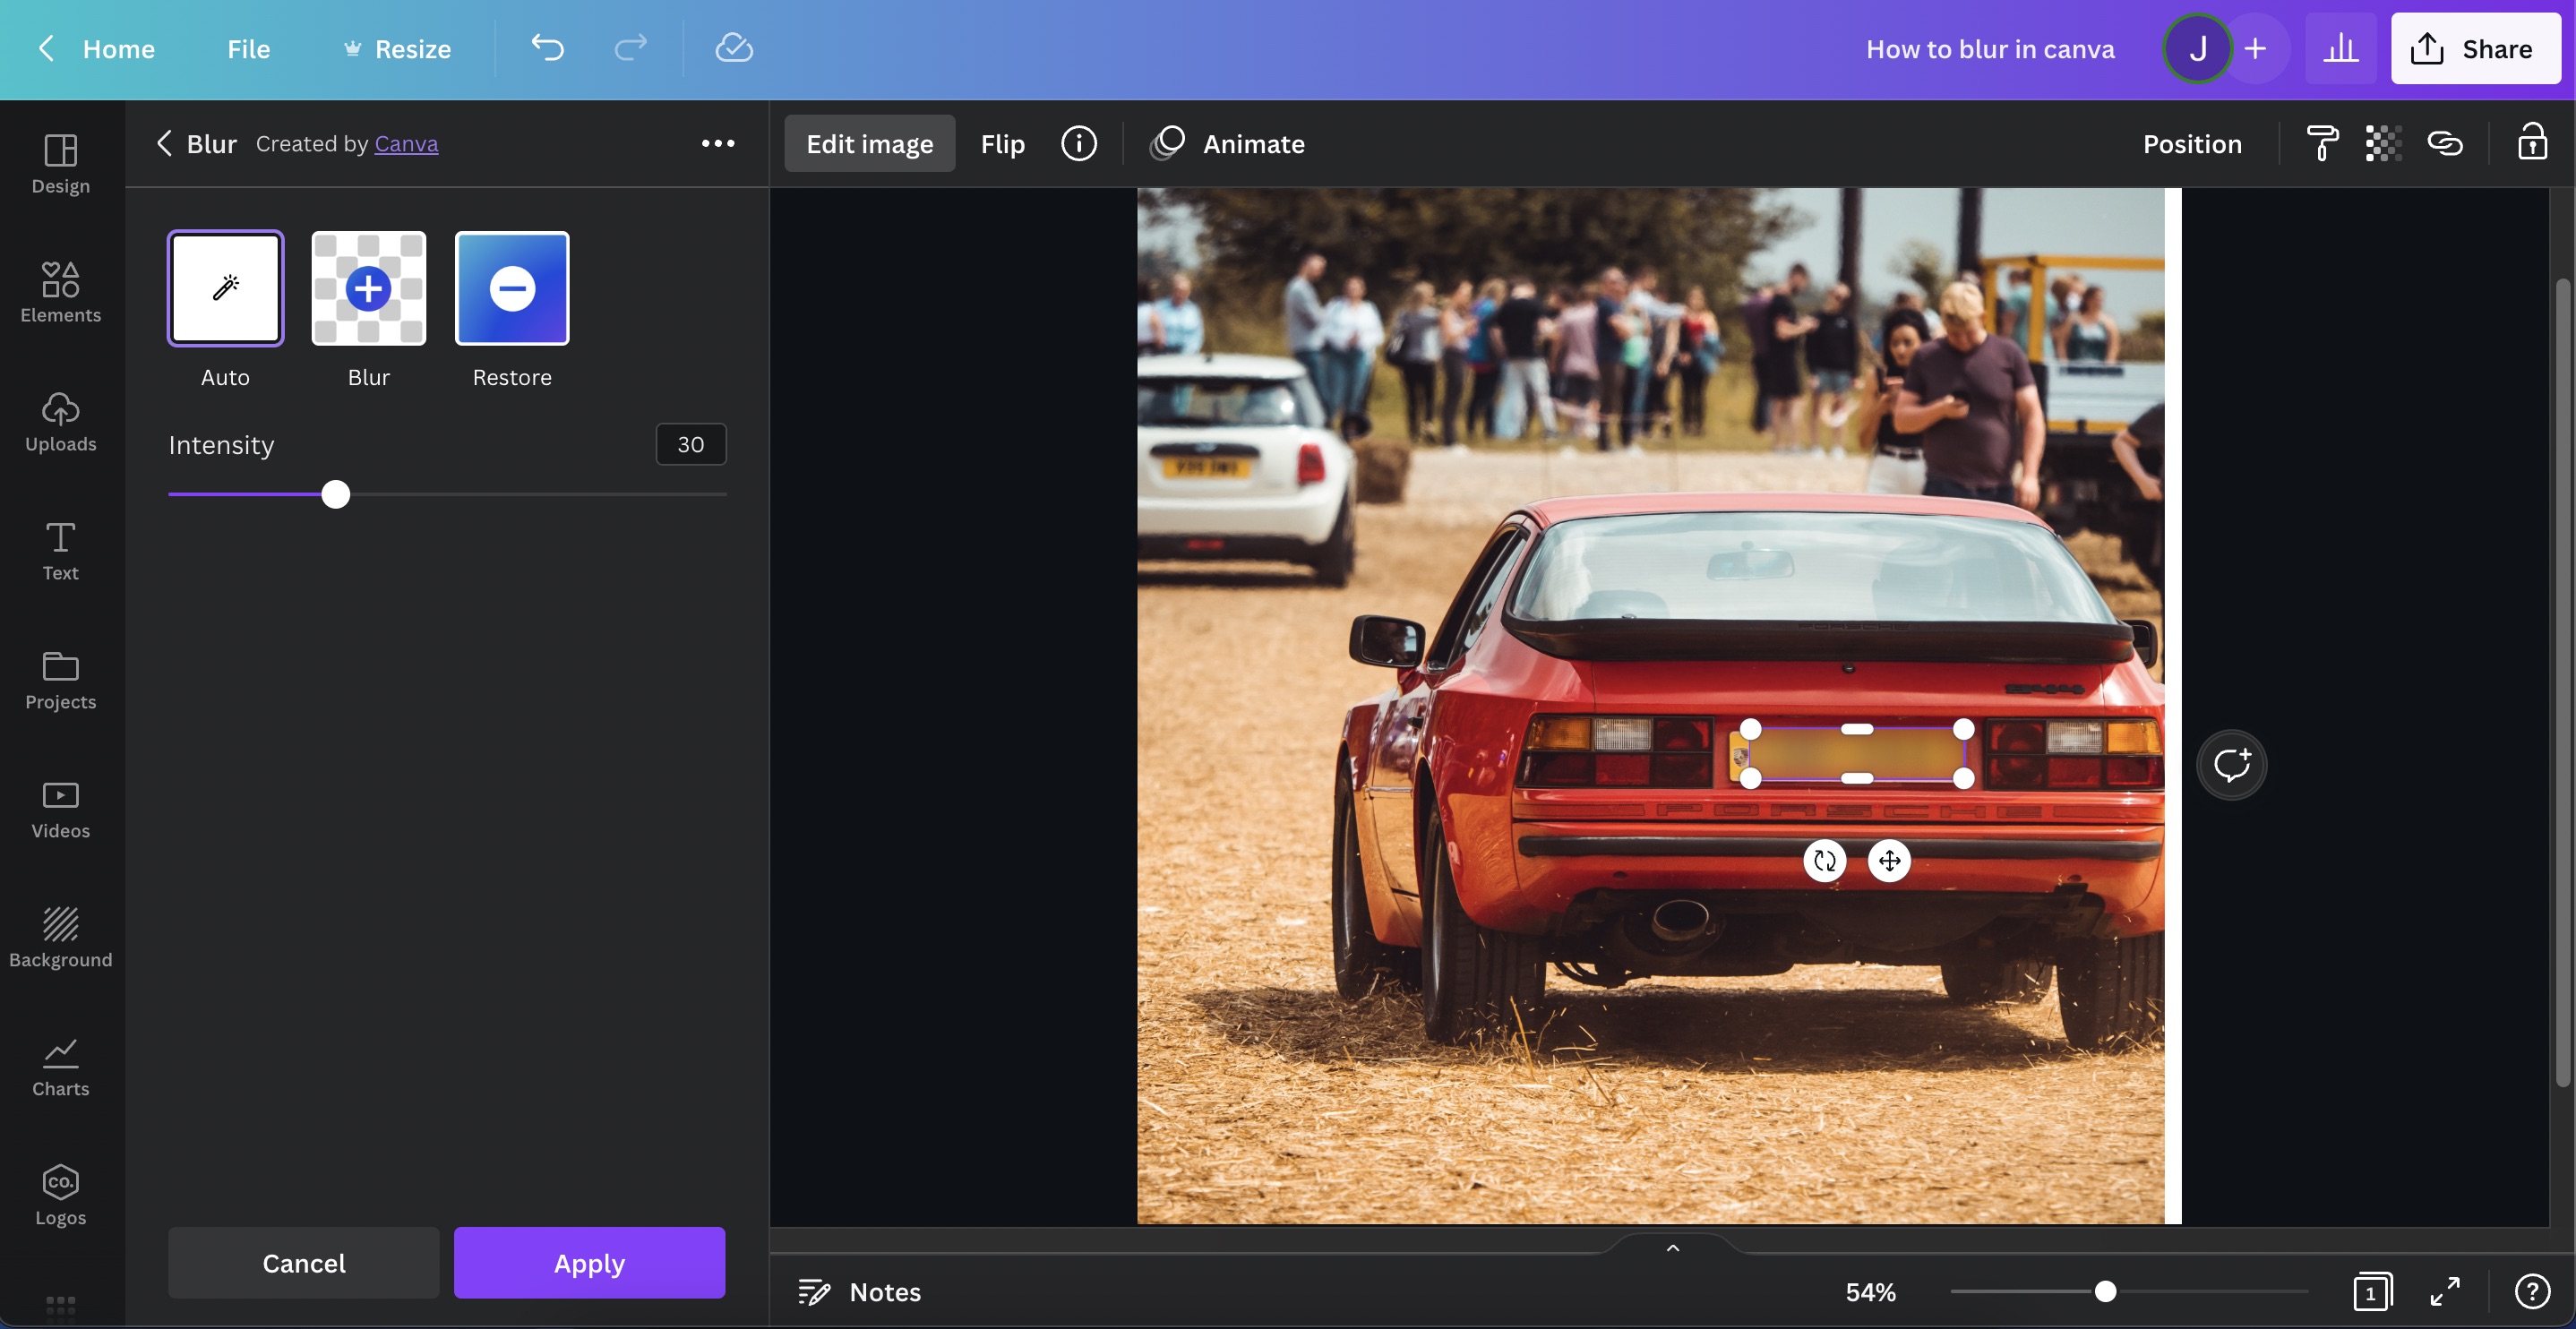
Step 7: Adjust Intensity
Make it more visually appealing by adjusting the intensity slider. And you're done!

Step-by-step checklist
Here’s your quick refresher of every blur method in Canva.
Blurring an entire image
✓ Select Photo
✓ Click “Edit Image”
✓ Choose “Blur”
✓ Select “Auto”
✓ Adjust Settings
✓ Apply
Blurring parts of an image
✓ Select Photo
✓ Click “Edit Image”
✓ Choose “Blur”
✓ Select “Brush”
✓ Adjust Settings
✓ Apply
Portrait mode blur
✓ Select Photo
✓ Click “Edit Image”
✓ Choose “Auto Focus”
✓ Adjust Settings
✓ Apply
Blur sensitive information in images
✓ Select Photo
✓ Duplicate Photo
✓ Resize to Fit the Text
✓ Edit Duplicate Imager
✓ Choose Blur
✓ Choose Auto
✓ Adjust Intensity