How to animate in Canva | Texts, Images, even GIFs!
Welcome to the third blog of this Canva tutorial series. Today we’re going to look at how to animate things on Canva, whether it’s texts, images, graphics, or charts. Whether it's for personal use or small business on Instagram, here, you’ll also learn how to control animation speed, order the execution of animations, and even create your own GIF! So without further ado, let’s get started.
How to Animate in Canva
Animating in Canva is very intuitive. Once you get the hang of it, you'll be posting eye-catching content on social media in no time! The steps for adding animations are all the same for texts, images, graphics, and other elements, so there’s no need to remember individual processes for each one. Oh and good news, none of these steps require a Canva Pro subscription!
Adding Animation to Texts, Graphics, and Images
Step 1: Select Your Element
Start by clicking on the element you want to animate. Aside from texts, images, and graphics, you can also animate charts or even ready-made Canva templates, it also works for stylish fonts!
Need a test subject? You can start by using their free stock videos.

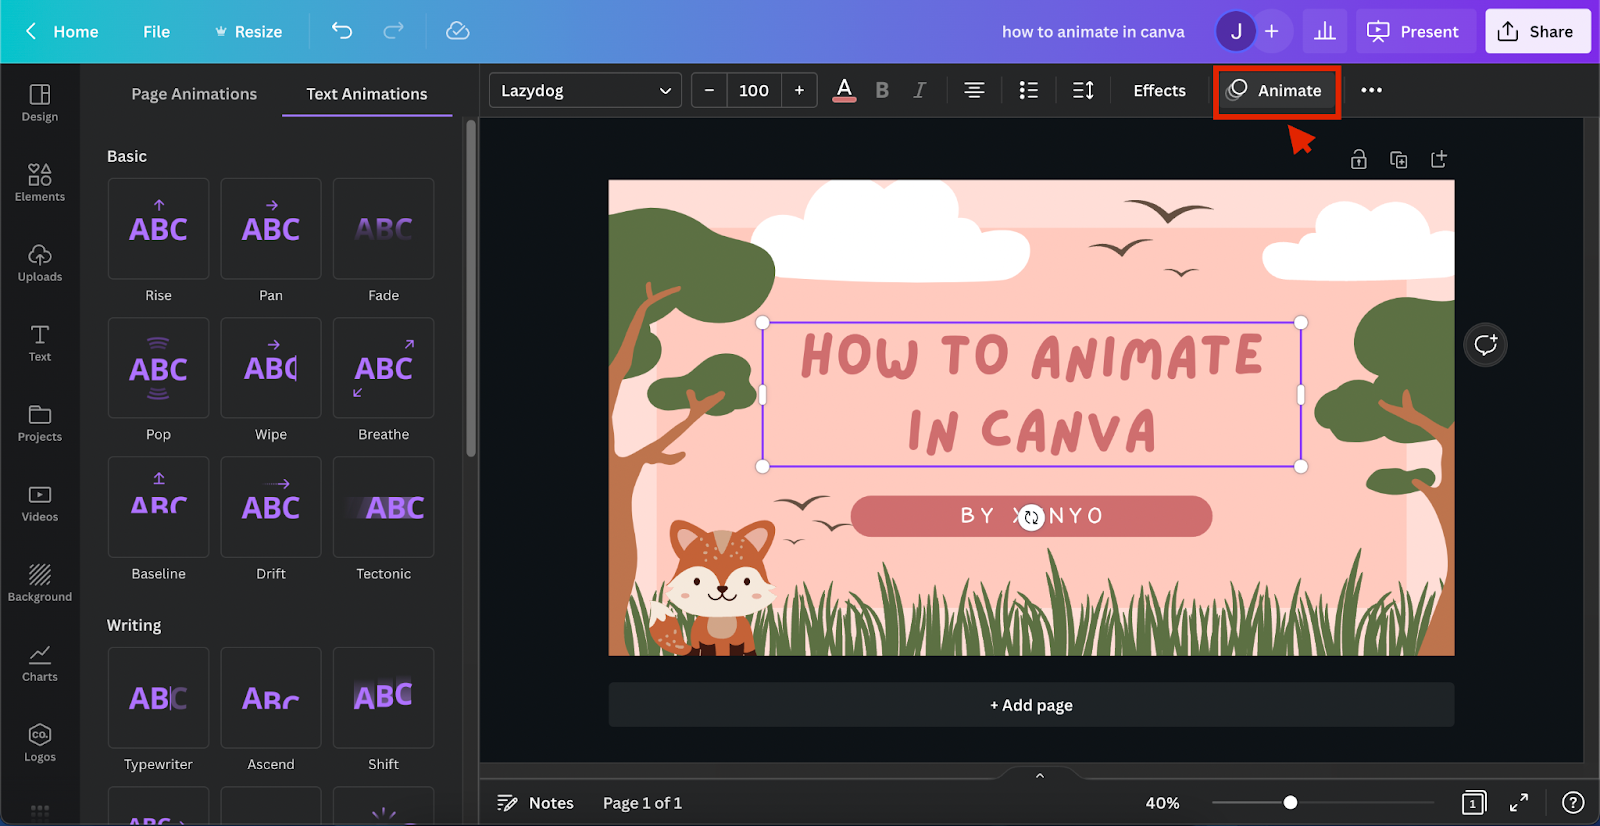
Step 2: Click “Animate”
Once clicked, a new toolbar will appear on top with ways to edit the element. Locate and select Animate.
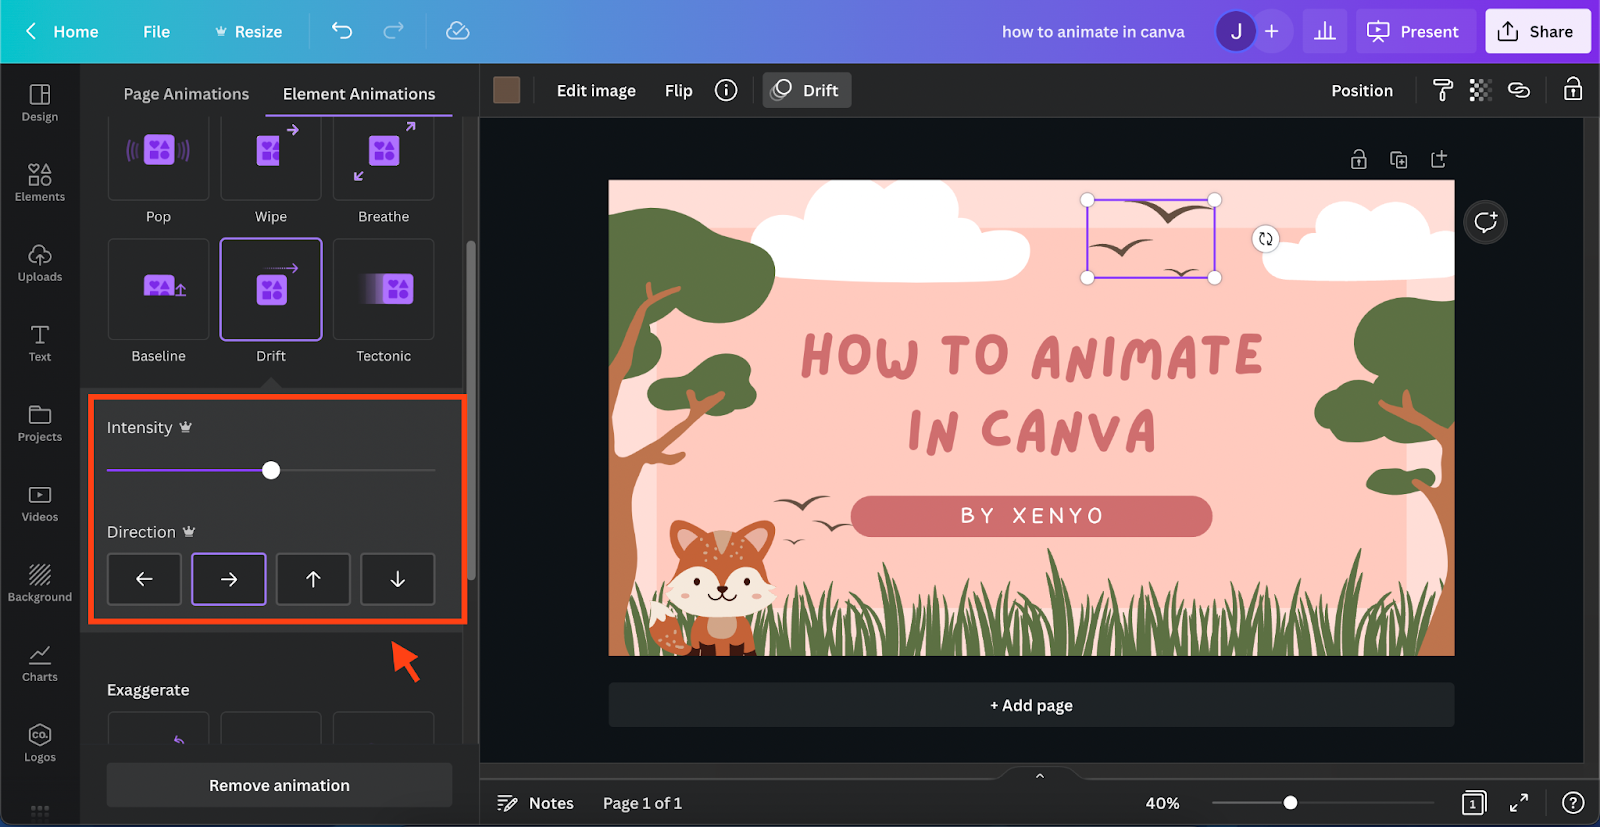
Step 3: Choose Your Animation & Customize
Here, you’ll be presented with various animation effects. Choose your preferred one and adjust its settings. Note that, depending on your element and chosen animation, there might be extra adjustments apart from the default speed slider.

How to Slow Down Animations in Canva?
The default graphic, image, and text animation can be quite fast. Slow down particular elements of your Canva design by following these steps.
Step 1: Select The Animated Element You Want To Slow Down
Choose the element that needs a slower animation.

Step 2: Click “Animate”
Again, at the newly shown toolbar on top, choose "Animate."

Step 3: Slide Down The Speed Bar
You will see a sliding bar for "speed." Move it left to slow down or right to speed up. It automatically runs the animation after sliding the bar, so there’s no need to click Present every time!

How to Time Animations in Canva?
There is no straightforward way to change the order of animations in Canva. However, I did find a workaround. Animations on a page run from the bottom up. Meaning that animated objects from the very back are triggered first and the frontmost are triggered last.
To do this, simply right-click on an element, and select “Send backward”, “Send to back”, “Bring forward”, or “Bring to front”. Alternatively, you can use keyboard shortcuts such as "cmd+[" to send backward, "cmd+]" to send forward on mac, and "ctrl+[" to send backward, "ctrl+]" to send forward on windows. To check your progress, click Present on top after editing.
How to make animated GIFs in Canva?
Do you have a brilliant idea for a GIF to post on Instagram, Facebook, Twitter, Youtube, or even Pinterest but don’t know how to get started? Here’s how.
Step 1: Add in All Your Design Elements
You must first prepare all of the included elements before creating your GIF. This could anything from videos, images, texts, shapes, etc.

Step 2 - A: Place your Design Elements in Order
Now that you have your stuff, the next thing you need to do is arrange them according to how you visualized the GIF.
Step 3: Animate Elements
This is an optional step because some of your elements might already be moving. Examples of these are animated arrow graphics, animated text, videos, and so on. In order to animate your elements, refer to the guide above.

Step 4: Adjust Animation Time
Now that everything has been added, placed, and animated, you need to adjust its settings. To help you with its duration, GIPHY recommends having GIFs with a maximum of 6 seconds. Again, note that slowing down animation speeds is a Canva Pro feature.
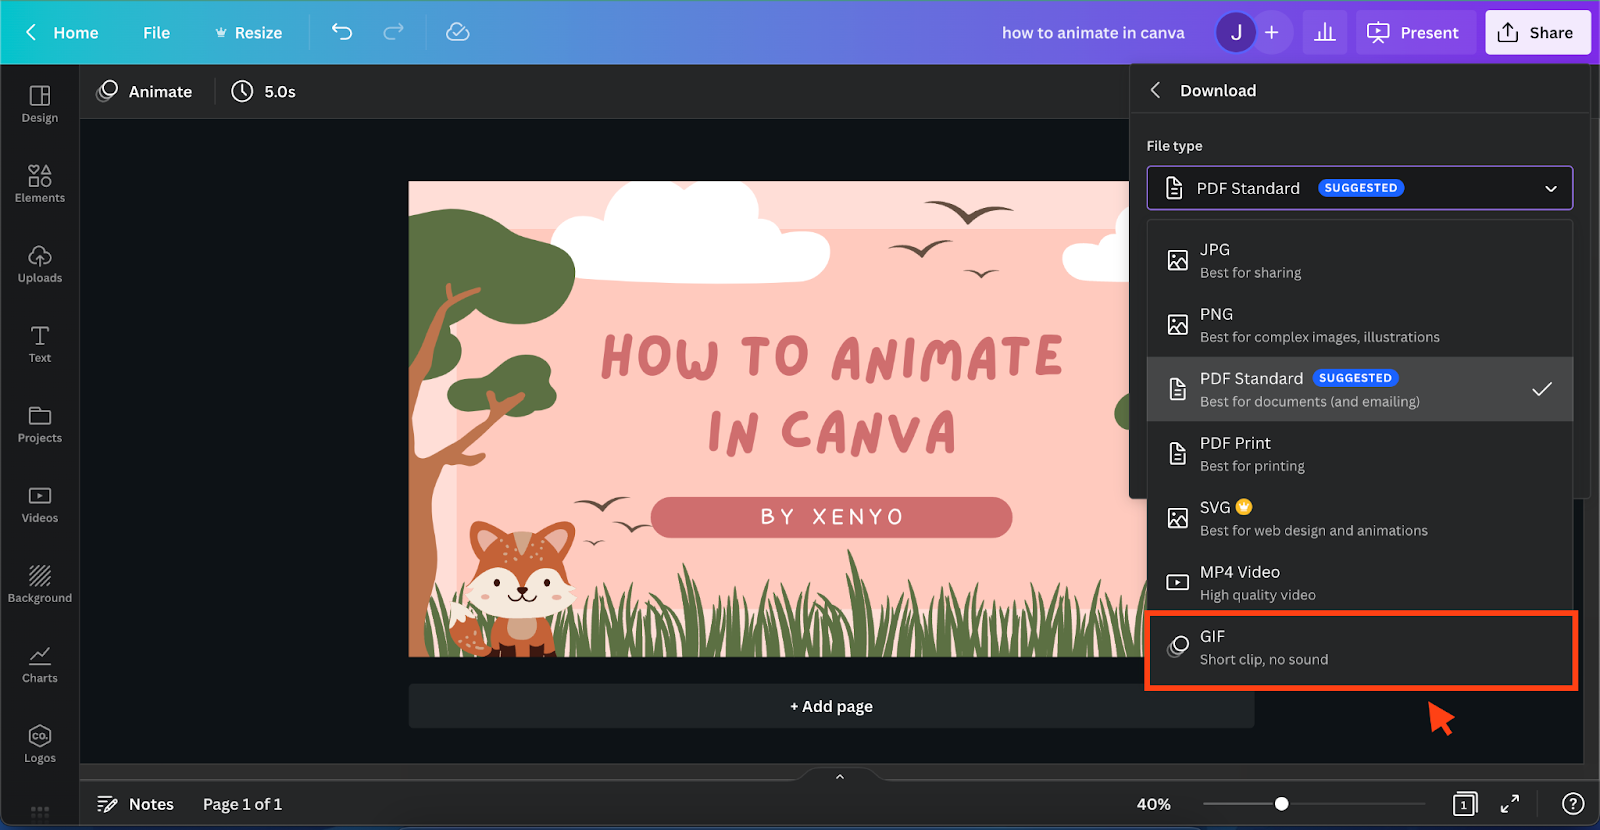
Step 5: Download as GIF
Your GIF is ready! Make sure to download it as a GIF or else it won’t loop. To do this, click Share > Download > File Type > GIF on the upper right corner. Currently, there is no convenient way to preview your GIF on Canva, to see how it looks like on loop, you would have to download each GIF iteration.
Quick FAQs
Can you animate in Canva Free?
Yes, you can animate without a Canva Pro subscription. The only process you cannot do in this guide is to slow down animations. Other than that, Every step to animate in Canva or create a GIF in Canva can be achieved without a paywall. All you're going to missing out on are some exclusive templates. Every animation style in Canva can be used for free.
How do you make objects move in Canva?
There are a few ways to make your Canva creation more lively. For one, you can use the GIPHY plugin from Canva apps by scrolling to the bottom of the leftmost menu (where Design, Elements, Upload, etc. is located) and choosing "apps". On the search bar, type GIPHY and start adding!
Another way is to use the "animate" feature of Canva seen above. With this feature, you can choose between dozens of animations for both elements and pages.
Conclusion
That’s how to animate in Canva. There are a few different ways to go about doing it, so find what works best for you. Be sure to check out our blogs for more Canva tips and tricks! Or if your looking for a trusted agency to build, revamp or optimize a website, email us at [email protected]